Schedule
Ideally, solutions should operate only in a specific period of the day. With this feature, you can add a weekly schedule for any solution. You can also add exceptions for special occasions, like holidays.
Schedules may not be assigned to Counters.
Schedule settings are available in the Control Panel.
Before you start
Please make sure that :
- the Time zone is correctly configured in the Control Panel.
- the Solutions which require scheduling are created and active.
Create a new Schedule
In the Control Panel, click the Schedule button.
Click the New Schedule button.
Add a name to the new Schedule.
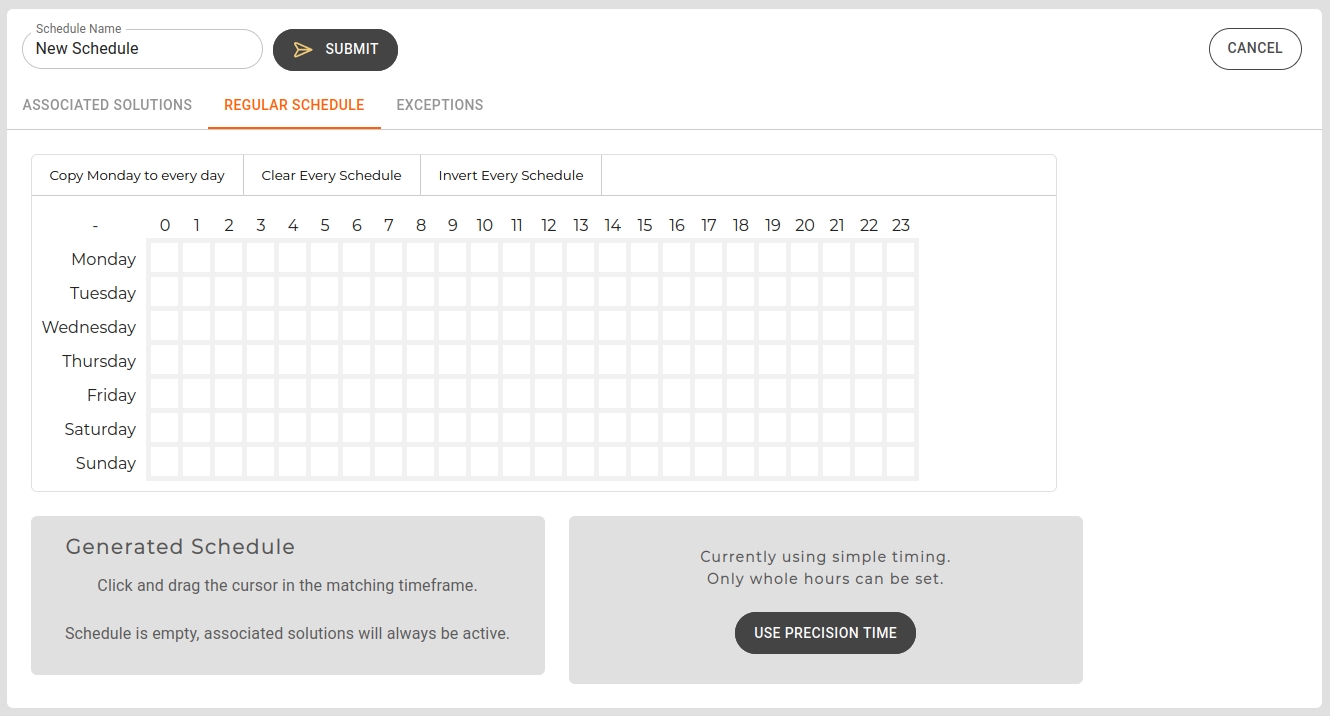
Select the operation time of the associated Solutions with clicking and dragging the mouse cursor. Fine tune the selection with mouse clicks.
Optional: For precise time adjustment, click the Use Precision Time button.
Click the Add New Time Range button for a new period of time.
Set the appropriate range.
Note: A Time Range's From value should not be later than the To value. An error symbol will indicate this problem.
Delete a Time Range by clicking the Trash button.
You can always go back to hourly precision by clicking the Revert to Simple Schedule button, however all Precision Time settings will be lost.
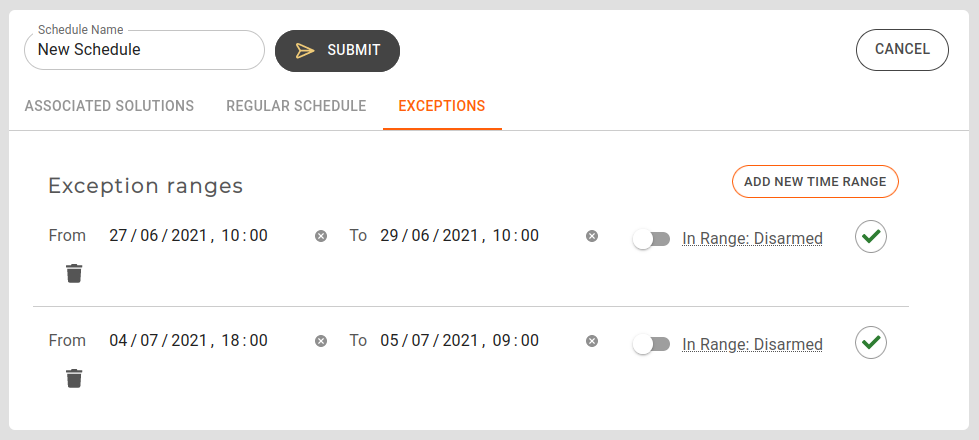
Optional: Add exceptions by clicking on the Exceptions tab.
Click the Add New Time Range button for a new exception.
Set the start and end dates. The start date should precede the end date. An error symbol will indicate this problem.
Set whether the Solution should be forced to Active or Inactive regardless of the Regular Schedule. You cannot set Active and Inactive values for the same duration. An error symbol will indicate this problem.
Delete a Time Range by clicking the Trash button.
On the Associated Solutions tab select the Solutions which will be scheduled by this configuration. One Solution can only be assigned to one schedule at a time.
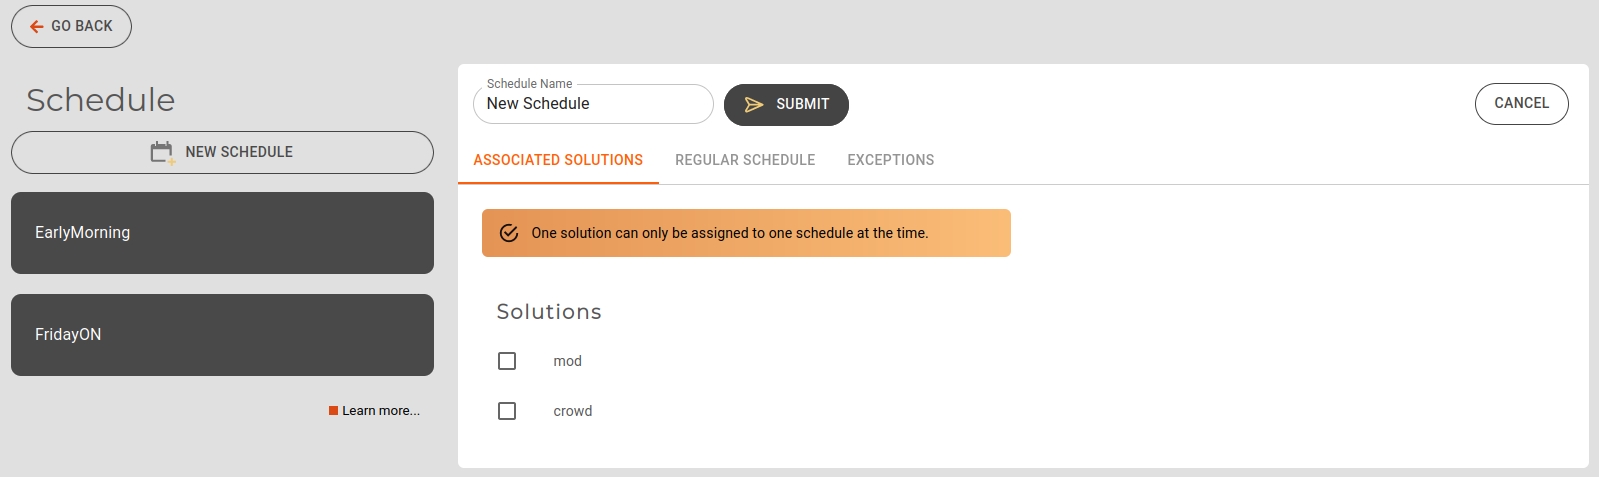
Click the Submit button.
Edit an existing schedule
- Select an existing Schedule by clicking its name from the Schedules list.
- Make your modifications the same way as in Schedule creation.
- Click the Save button.
Delete an existing schedule
- Select an existing Schedule by clicking its name from the Schedules list.
- Click the Delete button.
Next Steps
Everything is set and Ultinous AI Suite is ready to receive Events.