Immix CS Integration
Immix CS is a Central Station Monitoring tool, capable of receiving e-mails filtered by U-Filter, with an image snapshot of the detected incident attached.
NOTE: The following was tested on Immix's test environment, at https://testmydevice.immixprotect.com/devicetest
Before you start
Please make sure that you have:
A registered account for Immix CS.
Your cameras have been set up according to the configuration required by U-Filter.
A working SMTP server for sending e-mail.
Immix CS Integration
Setup Immix Alarm Session
NOTE: The following was tested on the Generic Stream option.
Open the Immix CS test interface.
In the upper icon bar, click Alarms.
On the left sidebar, select the driver corresponding to your specific device or choose Generic Stream for a generic test solution.
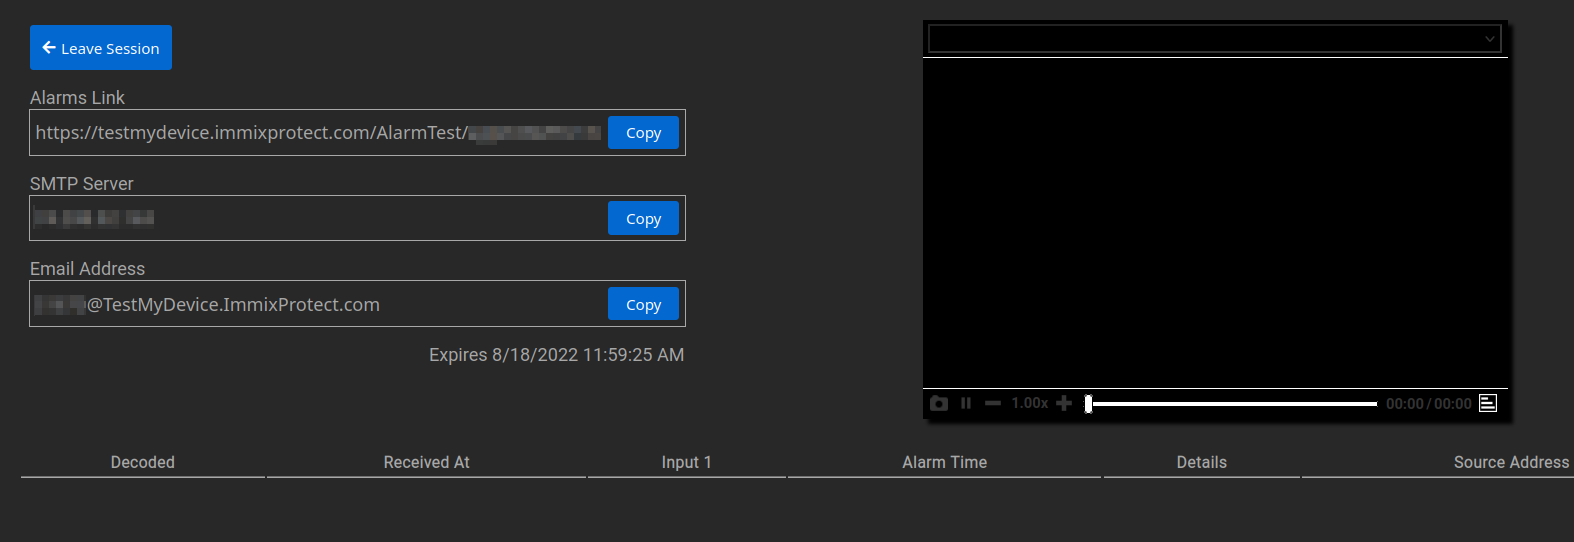
Click Create Alarm Session.
Immix has now generated the necessary data for U-Filter. Copy the data in the E-Mail Address and SMTP Server fields to the clipboard or otherwise note them down.
Configure U-Filter
- In U-Filter, open the Sites page -> Click the Configure button on the row of the Site you would like to configure.
- Choose Immix as the Integration type. If you would like to use a single e-mail address across all cameras in this Site, paste the e-mail address you copied from Immix into the Target address field. Otherwise, read below.
If you have U-Filter configured to use an SMTP server globally suitable for Immix integration, you may skip the next steps. Otherwise, continue to configure custom SMTP settings for this Site only, independent of your global settings.
Tick the Use custom SMTP settings button.
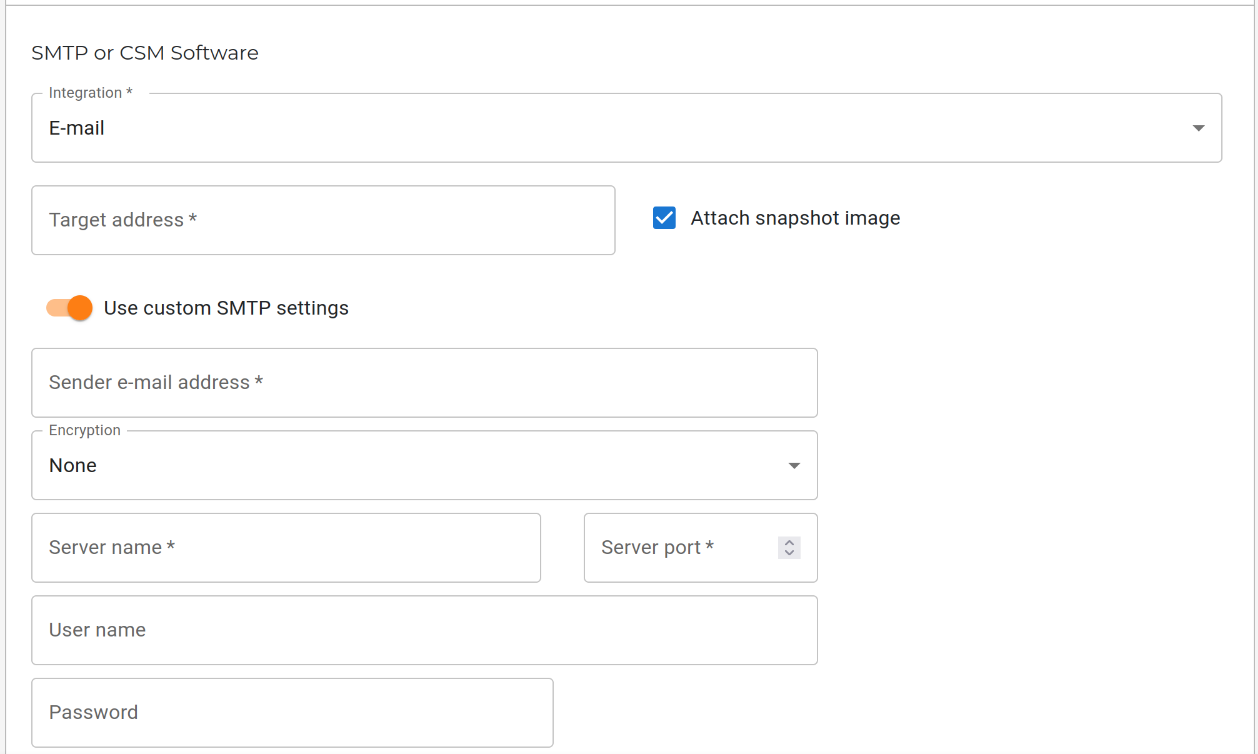
Fill in the Sender e-mail address field. Choose its Server port.
Paste the server address you copied from Immix into the Server name field.
Leave the rest of the settings as default, unless specified otherwise by your Immix setup.
Click Save. U-Filter is now ready to filter events sent to Immix CS!
Repeat steps 1-7 for each of your Sites you would like to filter data sent to Immix.
Channel Settings
- Click on your Site in the table row that you created above.
- Click the New Channel button in the upper left corner of the screen.
Fill in the data according to your needs. Fill in the External ID field as follows:
- You can define the Alarm Number (used in IMMIX) here. If you choose not to, the Alarm Number should be 1 in IMMIX.
- Alternatively, you can set an Immix email address here, which will override the Site level address. In this case, the Alarm Number should be 1 in Immix.
- You can either click Save and proceed to configuring your cameras, or optionally, configure your channel with additional filtering tools, described here.
Setting your Immix Email Address and IMMIX Alarm Number
U-Filter provides multiple alternatives for setting your Immix email address and Alarm Number. You can use a single email address for an entire site, or you can use different ones for each channel. You may also use the same Alarm Number for the entire site, or you can set a different one for each channel; see the table below for configuration options in U-Filter.
| U-Filter | |
|---|---|
| Site: IMMIX Target email address | Channel: External ID |
| You can set Immix email here for the entire site. | You can set the Immix Alarm Number here. Otherwise, the Alarm Number should be 1 in IMMIX. |
| - | You can set the Immix email here, specifically for this channel. In this case, Alarm Number should be 1 in IMMIX. |
Please see U-Filter’s Site and Channel settings for more information.
Viewing incidents in Immix
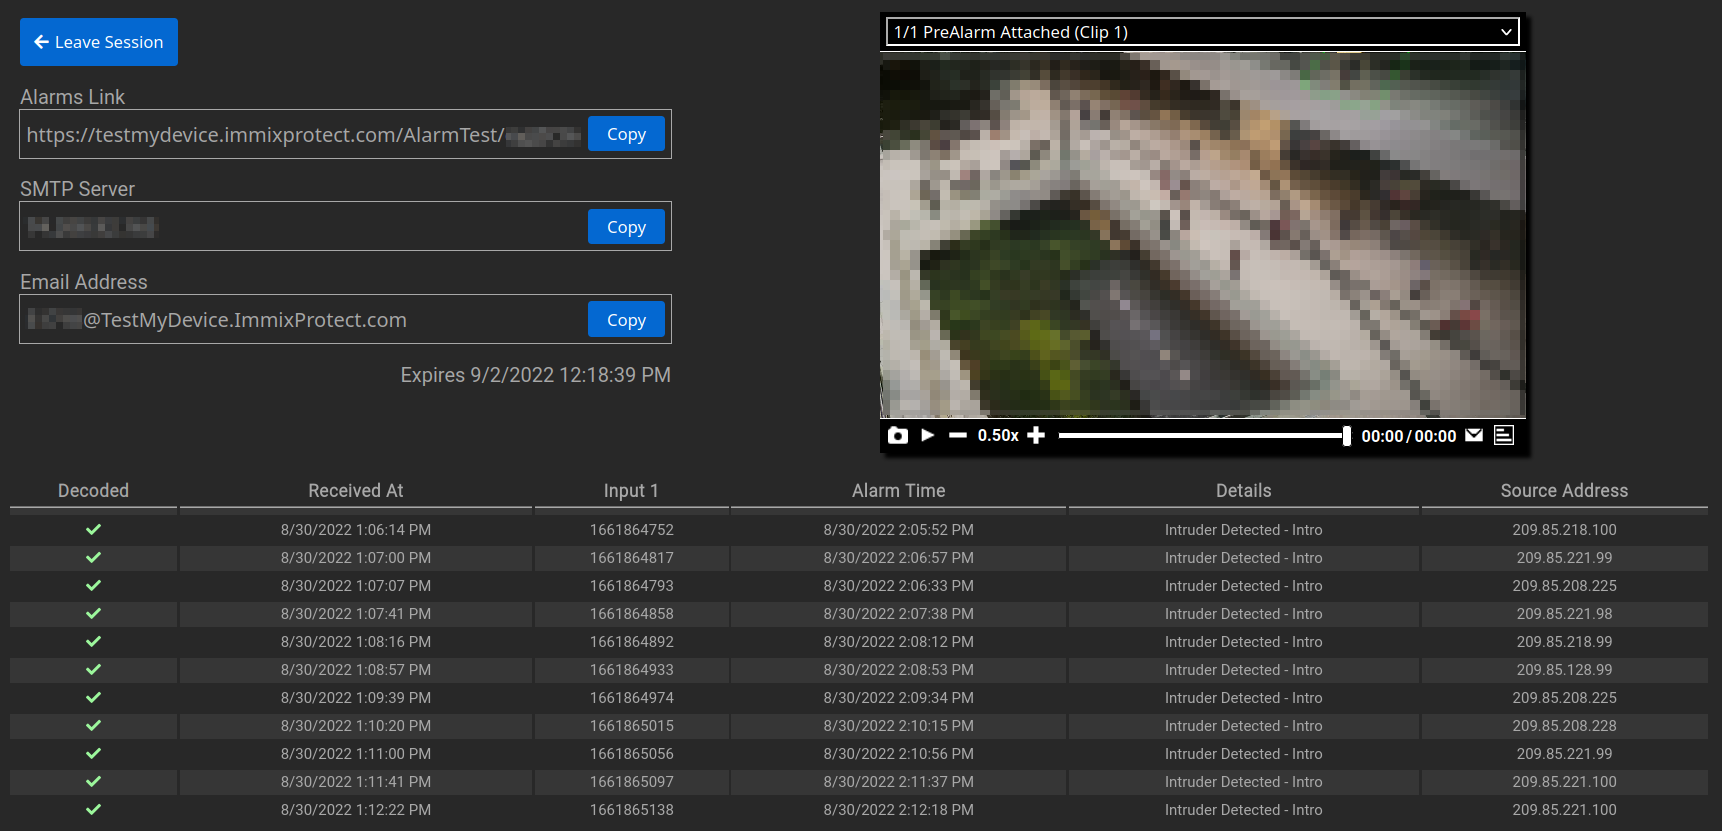
Once you receive an event filtered by U-Filter, it will appear as an entry in a list in the Immix Alarm Session screen.
U-Filter sends a snapshot of the incident, visible in the upper right corner of the Alarm Session screen, embedded in the video player.
Events received in Immix Alarm Sessions have an identifier attached - those filtered by U-Filter will show up as Intrusion events.
Event type handling
Consult the table below to see what events in Immix correspond to their U-Filter counterparts.
| Event type in U-Filter | event_type | Immix message EventType | Note |
|---|---|---|---|
| EVENT | U-Filter: Event | Object Detected | Adds image (if selected) |
| NEGATIVE_EVENT | U-Filter: Negative | LogicalEvent | Adds image (if selected) |
| FIRST_OVERLOAD_COOLDOWN | U-Filter: Overload +ends at: ... | LogicalEvent | no image |
| ERROR | U-Filter: Error +error message | LogicalEvent | no image |
| INVALID_IMAGE | U-Filter: Invalid image +error message | LogicalEvent | no image |