Camera Setup: U-Filter
In this tutorial we will examine how to set up a camera in order to work with U-Filter. Note that in case your cameras are connected to an NVR, individually setting up SMTP for your cameras is not necessary, as it is handled by the NVR. In that case, configure an SMTP server on the NVR, then read our guide on configuring NVR channels in U-Filter.
NOTE: U-Filter has an implementation dedicated for Milestone XProtect. For that version, you can skip this article entirely.
Before you start
Before you begin configuring your cameras, please make sure that you have all of the following available; note that these are data provided by the U-Filter web interface. For more information, read our guide on setting U-Filter up.
SMTP settings for e-mail sending:
Sender Address: Not used, any value is acceptable.
SMTP Server: ufilter.ai
SMTP Port (depending on encryption): 465 ( if SSL/TLS), 25 or 587 (if STARTTLS or No Encryption)
Authentication: Yes
Username: <accout_id>-<site_id>
Password: <password>
Receiver's Address: <channelid>@ufilter.ai
NOTE:
- This email address is different for each camera.
- Domains may differ by installation.
- If multiple recipients are provided by the e-mail sending service, only the last one is taken into consideration.
Setup Steps
Common camera settings
U-Filter analyses video snapshots. The maximum resolution is 1920 x 1080 pixels: larger resolution images will be scaled to Full HD. The minimum detectable object size is 32 px (vertical) on a Full HD image.
Special settings for thermal cameras
Regarding the minimum detectable object size, it is the thermal sensor that matters, not the upscaled video image.
For U-Filter, it is recommended to use "white on black" color scheme for better accuracy.
Triggering event
Every image processed by U-Filter has a camera as their source. Image taking is triggered by events - such as a built-in intrusion, person, vehicle detection or a simple motion detection. Such camera-generated events detect all incidents while also produce high false alarm rates - which are going to get filtered by U-Filter.
NOTE: It is very important that each incident should trigger an event on your camera. U-Filter removes the false events and retrieves the real ones. However, the performance of the solution is affected by the number of false alarms - therefore the more advanced the triggering event is, the less load U-Filter will have. This means that built-in object detection (with high sensitivity) is preferred over motion detection.
Sending a snapshot to U-Filter
Once an event is triggered, a snapshot image is sent to U-Filter. Multiple image sending is allowed, in that case all images will be analysed.
Email (SMTP Settings)
The image is sent via e-mail. The required e-mail parameters need to be ready before proceeding.
Setup Examples
Axis
This configuration was tested on the following cameras:
AXIS Q6315-LE PTZ Network Camera
AXIS Q1941-E Thermal Network Camera
In order to send images to U-Filter, the following steps are required:
- Create an mjpeg stream profile for image extraction.
- Set up a motion detector.
- Configure email settings.
- Create a Rule which extracts an image upon motion detection and sends an email to U-Filter.
Create an mjpeg stream profile
- In the bottom menu select the Stream tab.
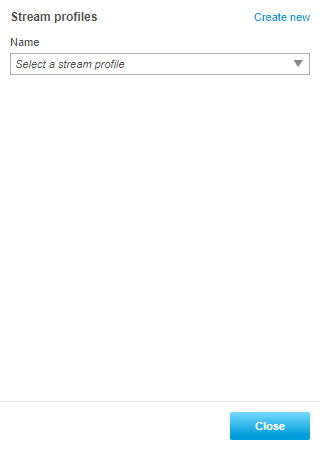
- Click the Stream Profiles button
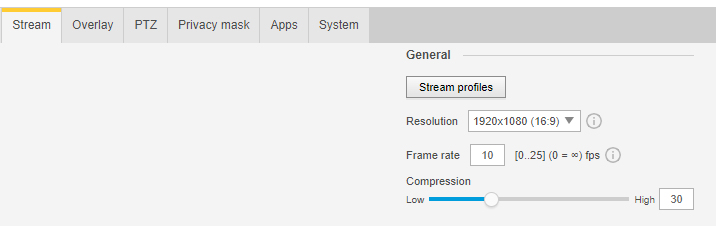
- In the pop-up click the Create new label.
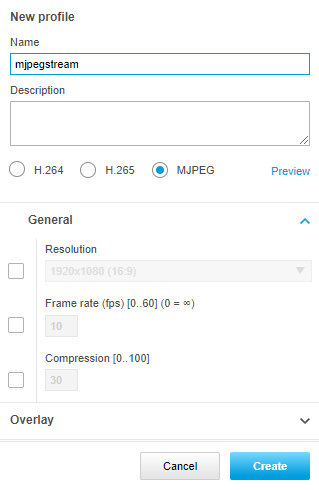
- Give a name to the new stream profile.
- Set the codec to MJPEG.
- The recommended resolution is 1920 x 1080.
- Set the Frame rate (fps) to at least 1.
- Set the Compression level to a low value (5-30).
- Click the Create button to finalise the stream profile.
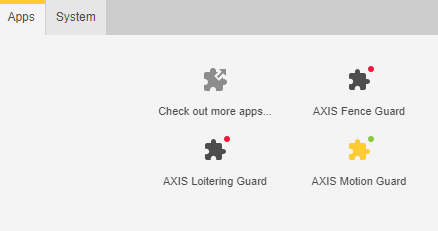
Setup motion guard
In the bottom menu select the Apps tab.
Select AXIS Motion Guard.
Note: In this example, Motion Guard is used, but any other triggering event is appropriate which detects all real incidents at a cost of high false alarm rate. False alarm rate will be lowered by U-Filter.
- Define the Include area and Exclude Area.
- (optional) Define Filters to avoid unnecessary overload of U-Filter.

Email settings
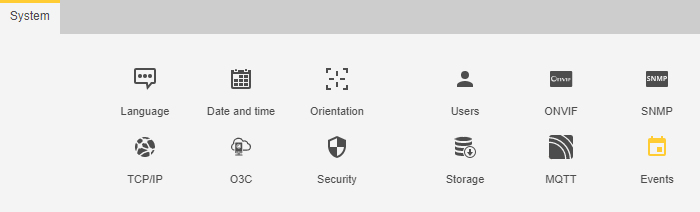
- In the bottom menu select the System tab.
- Select Events.
Under the Device events select Recipients. Let's add the e-mail settings.
Note: This is the step where the SMTP settings you received for U-Filter can be configured.
Give a name to the setting.
Type: Email.
Send email to: type the Receiver's address here.
You can use only one email address for a single camera. Different cameras need different e-mail addresses.
Send email from: not used, any email address is acceptable.
Username: type the User Name here.
Password: type the U-Filter Password.
E-mail Server (SMTP): type the U-Filter SMTP Server address here.
Port: 25
Encryption: None
You can test these settings with the Test button. Only the server connection gets checked, no images will be sent to U-Filter. If the test is successful, you can be sure that the email settings are set properly.
Click the Save button to save these settings.

Creating a Rule
In the bottom menu, select the System tab.
Select Events.
Under Device events, select Rules.
Note: This is where you will convert your settings into a Rule for U-Filter.
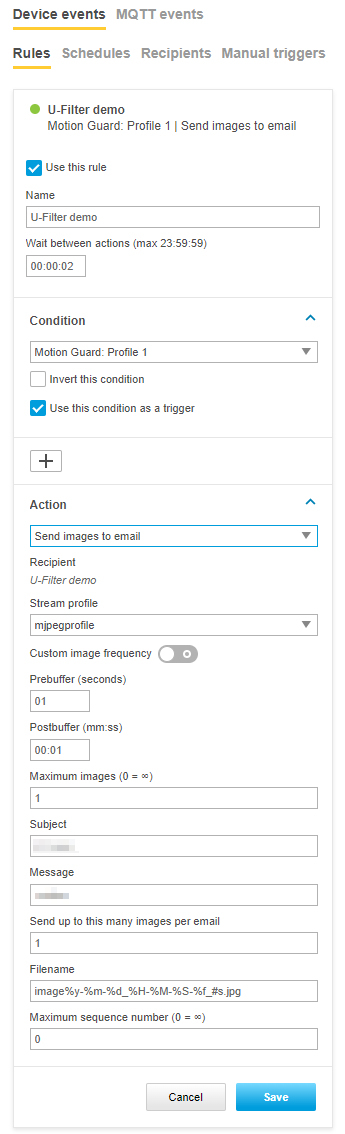
Name your Rule.
Set the Wait between actions for a low value, e.g. 2-3 seconds.
Note: This value acts as a cooldown, therefore setting it to a value too high may result in missing some detections.
Condition: Select the profile created at the top of the window (Motion Guard: Profile 1 in our example).
Use this condition as a trigger: yes ✔️
Select Send images to email as the Action.
Select the previously created MJPEG stream profile as the Stream profile.
Set Maximum images and Send up to this many images to email to ensure that there will be at least 1 image about the incident. In this example we set it to one. These values ensure that one image gets sent per e-mail.
Note: Sending too many images puts unnecessary load on U-Filter servers making your system performance unoptimal.
Type a Subject and Message to your liking, and leave the rest of the settings as shown on the image above.
Bosch
This configuration was tested on a Bosch DINION IP 500 HD camera.
Alarm Settings
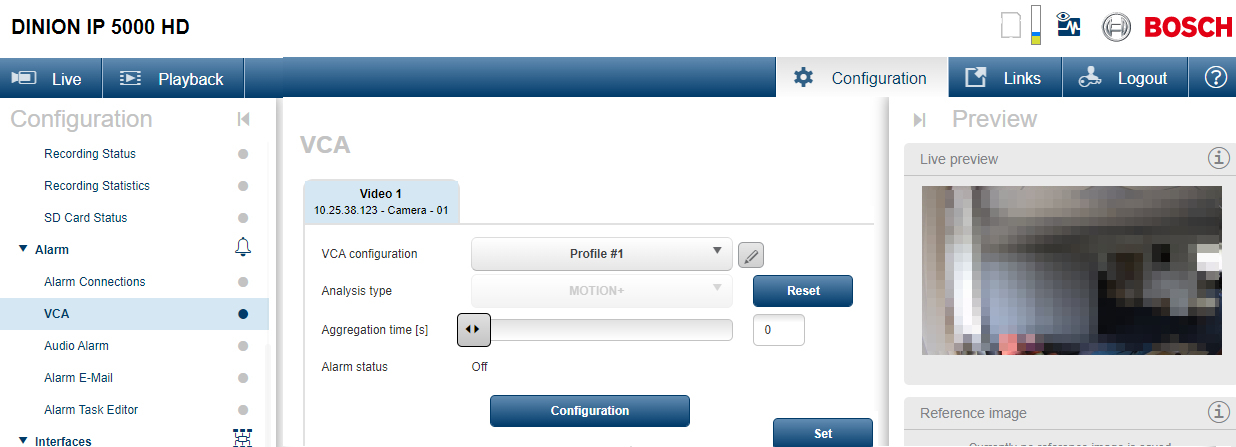
In the upper menubar, select Configuration.
In the left sidebar, under Alarm, open VCA .
Set up the triggering analysis type here, such as motion.
E-mail settings

In the upper menubar, select Configuration.
In the left sidebar, under Alarm, open Alarm E-Mail.
Set Send alarm e-mail to on.
Fill in the SMTP settings according to your server's configuration.
Format: choose Standard (with JPEG).
Note: U-Filter requires this format.
Image Size: Set the required resolution here.
Attach JPEG from camera: yes ✔️
VCA Overlays: Make sure it is turned off.
Enabling this option would draw additional bounding boxes over the images, which would affect the accuracy of U-Filter.
Destination address: Type the e-mail address you received for this camera only. Make sure that the e-mail address is not used elsewhere.
You may test your configuration by pressing the Send Now button. Only the server connection gets checked, no images will be sent to U-Filter. If the test is successful, you can be sure that the email settings are set properly.
Hikvision
This configuration was tested on a Hikvision DS-2CD2F42FWD-IWS camera.
E-mail settings
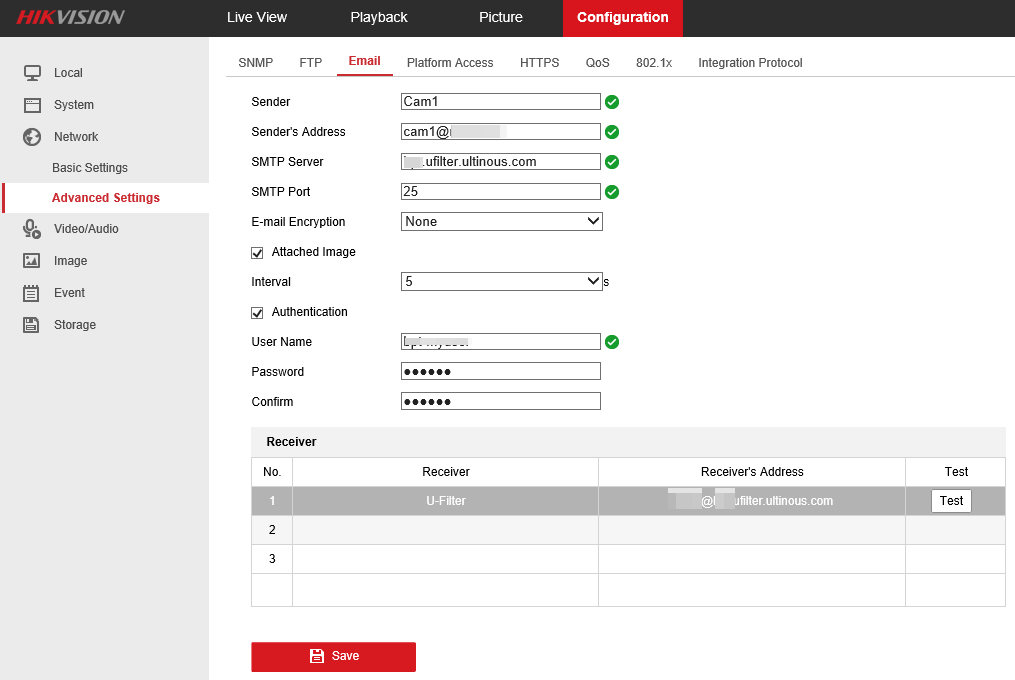
In the upper menubar, select Configuration.
On the left sidebar, click Network, then Advanced Settings.
Type any name for Sender.
Fill in the SMTP settings according to your server's configuration.
Attached image: yes ✔️
Interval (in seconds): Set it to a low value, e.g. 5.
Set an e-mail address as Receiver Address in the table at the bottom of the window. Use an e-mail address for this camera only. Make sure that the e-mail address is not used elsewhere.
NOTE: Clicking the Test button checks only the connection. Attached snapshots will not be sent to U-Filter. Therefore, it is not suitable for end-to-end testing.
Event Setup
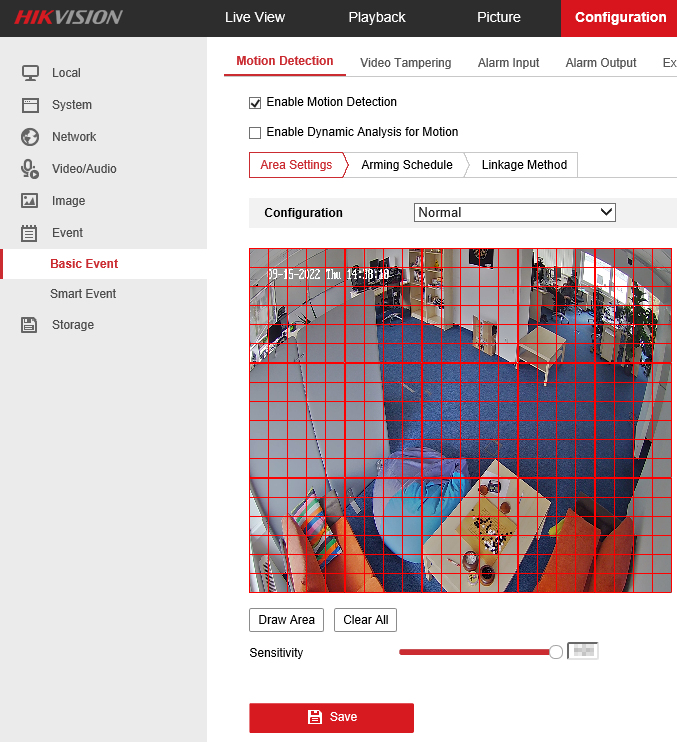
In the left sidebar, under Event, select Basic Event.
Select a triggering alarm type, e.g. Motion Detection.
Enable Motion Detection: yes ✔️
Sensitivity: make sure it is turned high.
On the Arming Schedule tab, you can set the time frame of the observation.
Select the Linkage Method tab.
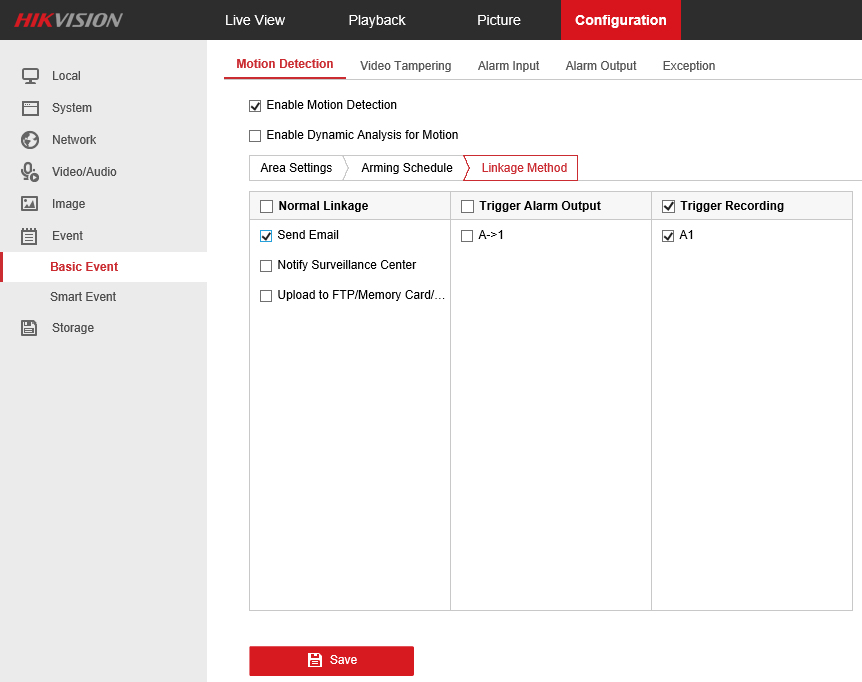
Send E-mail: yes ✔️
Click Save.
Hunter
This configuration was tested on a Hunter Supreme 4G model.
Mail account: <user>@ufilter.ai
Mail server: You may type the host's IP address as the Mail server.
In the PIR menu:
- Sensitivity: High
- Delay:
00:00:03
In the Cam menu:
- Image Size: select the closest to 1920 x 1080
- Night Mode: Min.Blur
- Multi-shot: 1
Vivotek
This configuration was tested on a Vivotek FD8177-H camera.
All settings below are avaliable under the Configuration tab in the upper tab bar.
Setup Motion Detection
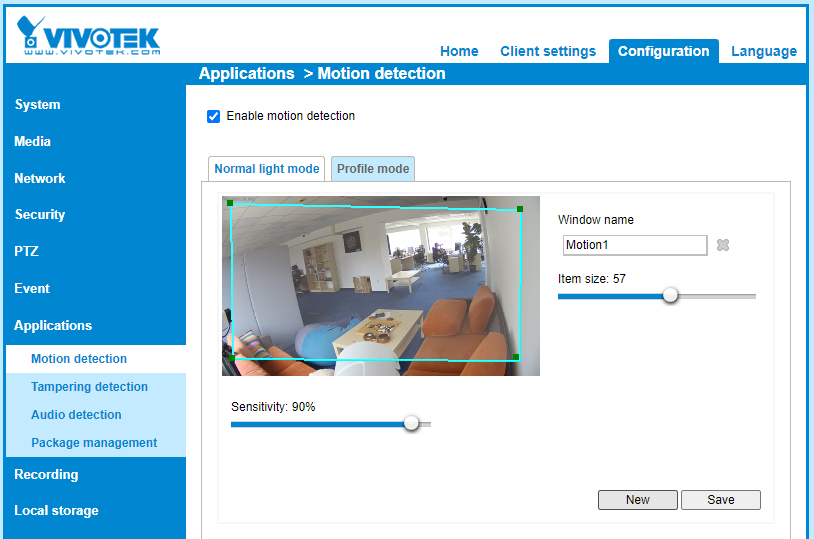
In the left sidebar, under Applications, open Motion detection.
Enable motion detection: yes ✔️
Add a name as Window name. In this example it is named to Motion 1.
Optionally set the Item size slightly below the smallest expected object size.
Sensitivity: make sure it is set to a high value.
Click Save.
Event Settings
Event Server
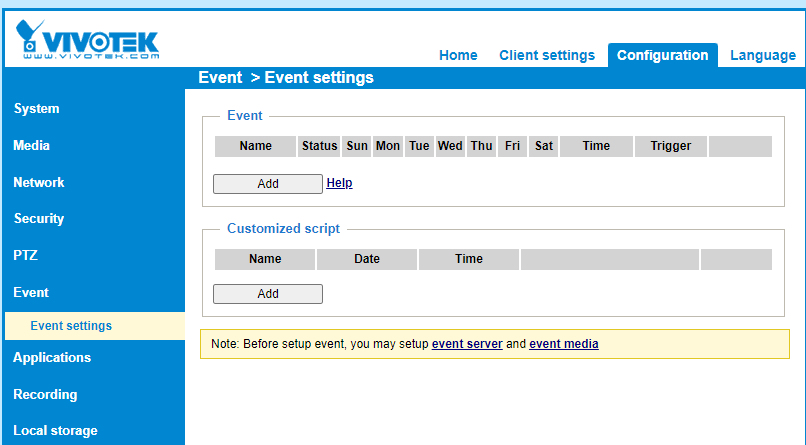
In the left sidebar, under Event, open Event settings.
Click event server.
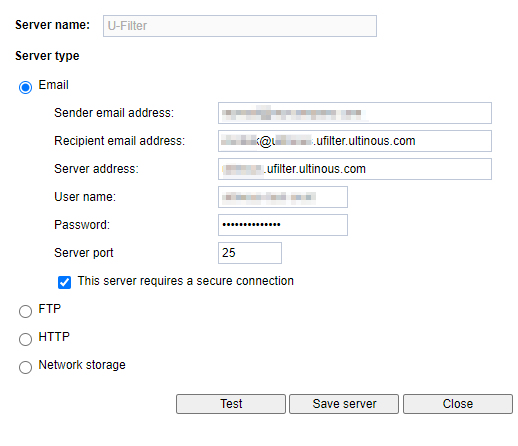
Give the event server a name, e.g. U-Filter.
Select E-mail as Server type.
Fill in the SMTP settings according to your server's configuration.
Click Save server.
NOTE: Clicking the Test button checks only the connection. Attached snapshots will not be sent to U-Filter. Therefore, it is not suitable for end-to-end testing.
Event Media
- In the Event settings window, click event media.
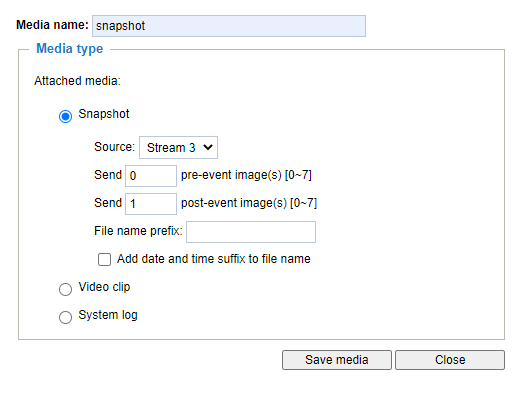
Type a name for Media name.
Select Snapshot as Attached media.
Select a stream solely dedicated to U-Filter as Source.
Send 0 pre-event and 1 post-event images. This will ensure that only one image gets sent per e-mail.
Click Save media.
Event
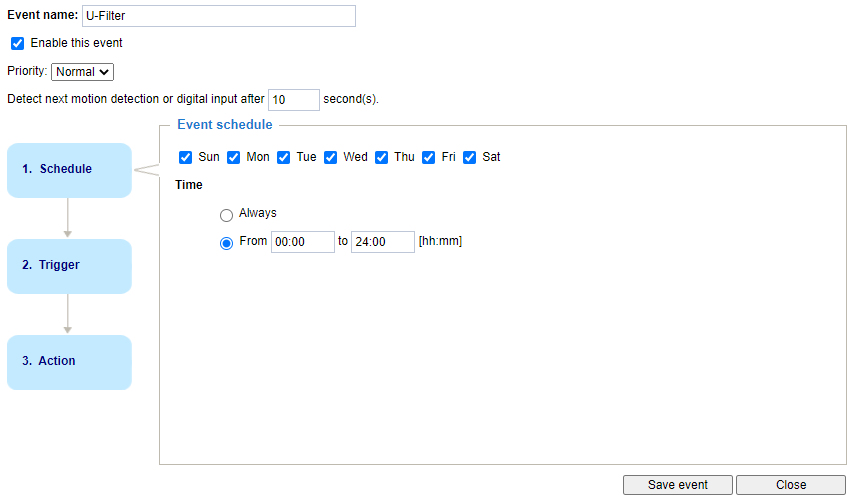
In the Event settings window, under Event, click Add.
Type a name for your event, e.g. U-Filter.
Enable this event: ✔️
For Schedule, select the desired time frame to observe.
Click Trigger.
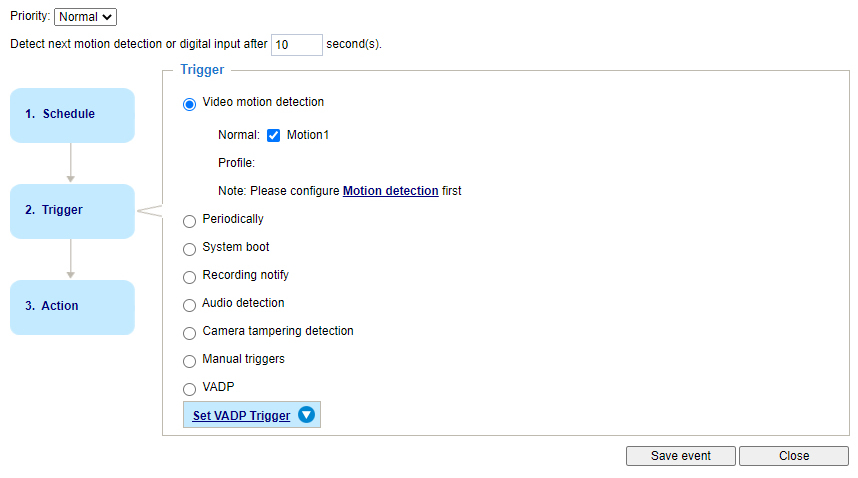
To use the camera's motion detection, select Video motion detection as Trigger.
Select the previously created Motion detection by its Window name (in this example: Motion1).
Click Action.
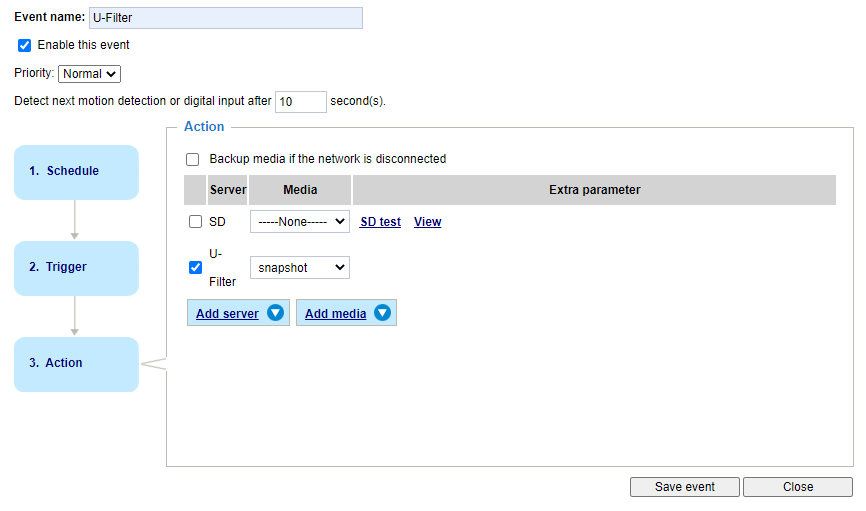
In the list of Servers, tick the checkbox next to the previously created U-Filter. From the dropdown menu next to it, select the previously created snapshot as Media.
Click Save event.
All done. U-Filter should receive emails from now.
Wisenet (Hanwha)
This configuration was tested on a Wisenet QNV-6082R camera.
The following settings are available under the Settings tab (cog wheel button in the top bar).
IVA (Intelligent Video Analytics) settings
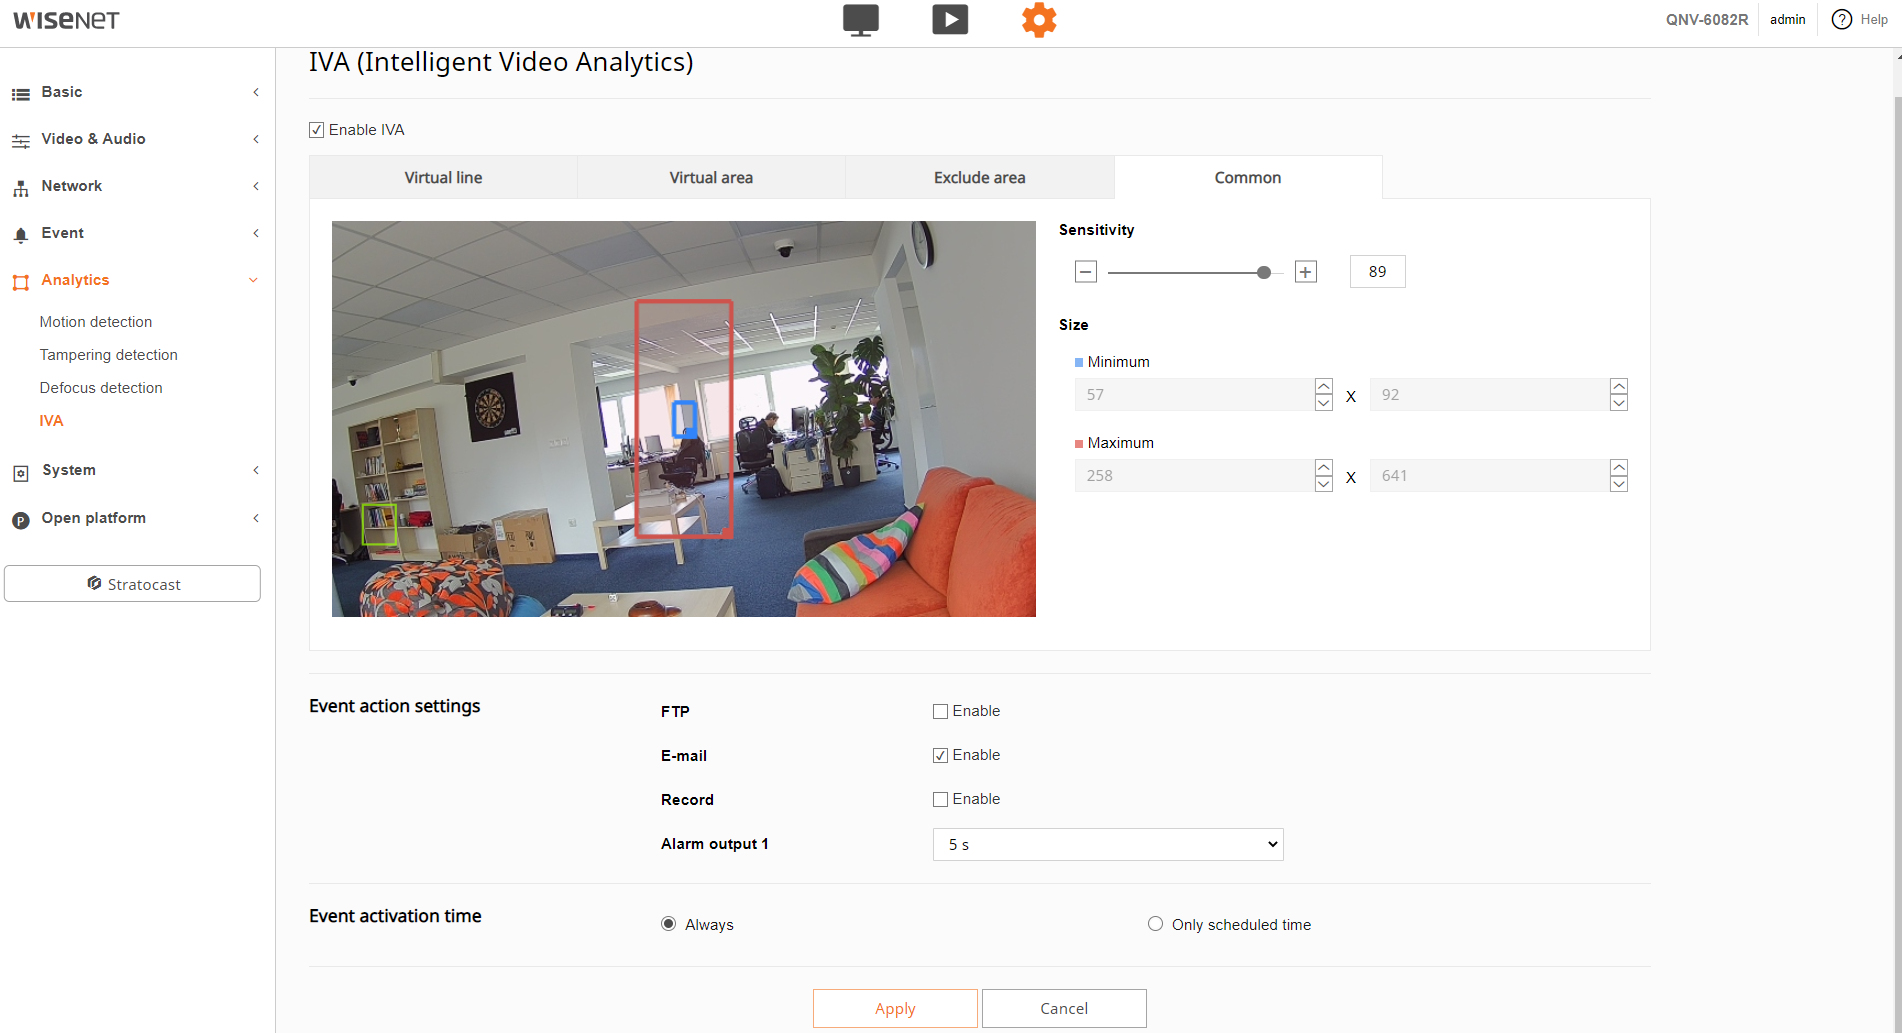
In the Analytics menu, select IVA submenu.
Tick the checkbox next to Enable IVA.
Select the Common tab.
Set the Sensitivity to a high level.
Set up the Minimum and Maximum Size of the expected objects. Draw a rectangle for both values on the video image.
In the Event action settings section, select E-mail. Set the Alarm output to 5s.
Optionally, you can set the Event activation time here to determine the observation time schedule.
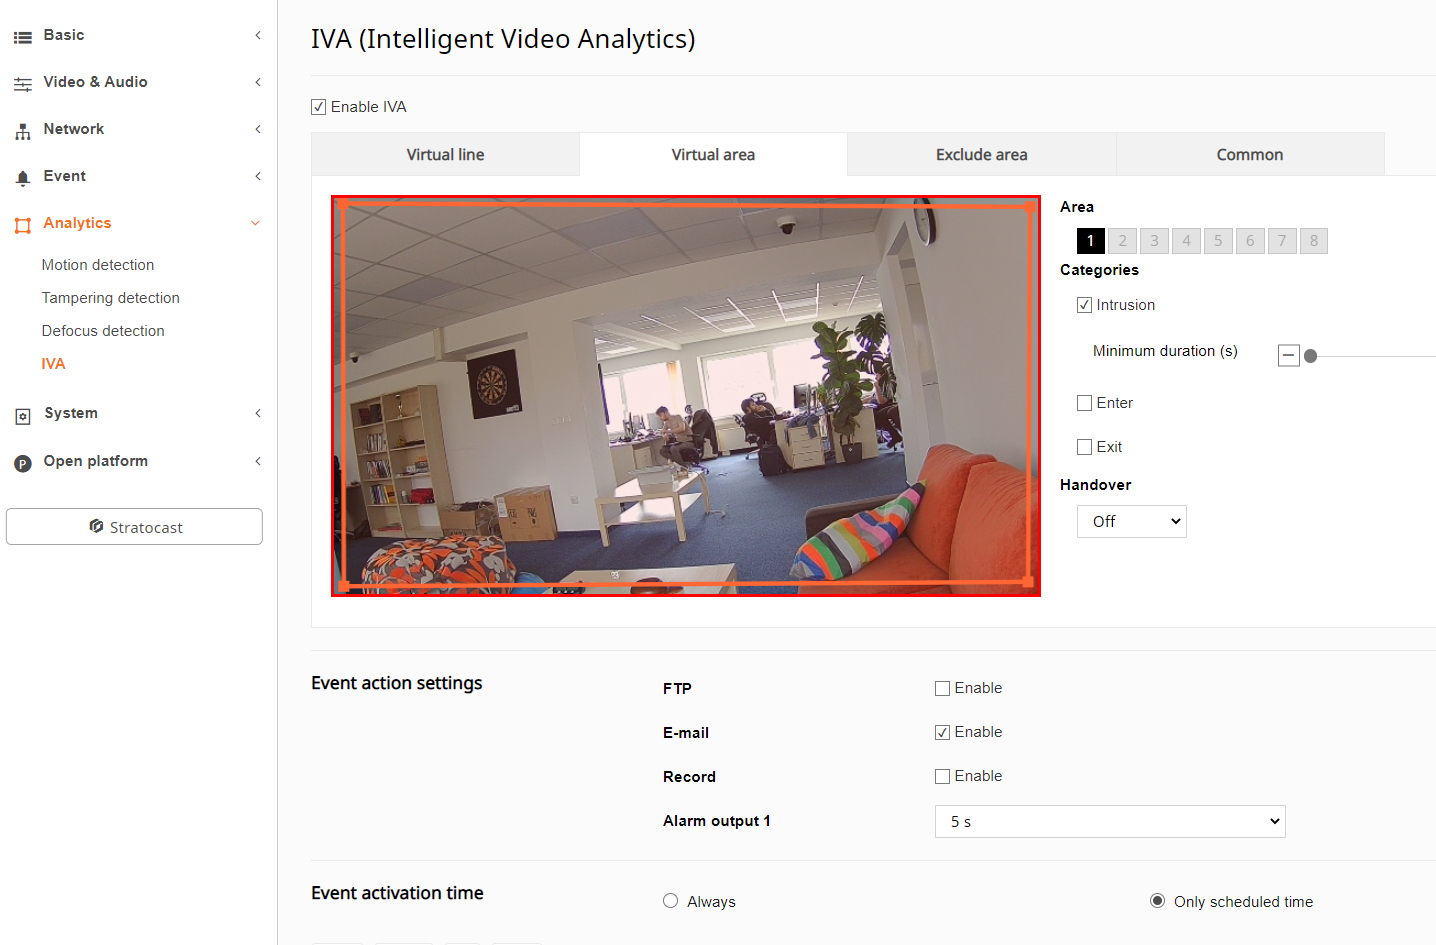
Select the Virtual area tab.
Determine the observed area in the video image as Area 1, Area 2, etc.
In the Categories section, select Intrusion. Set the Minimum duration (s). Images will be sent to U-Filter only after an object is visible for the amount of time set here.
Click the Apply button.
E-mail configuration
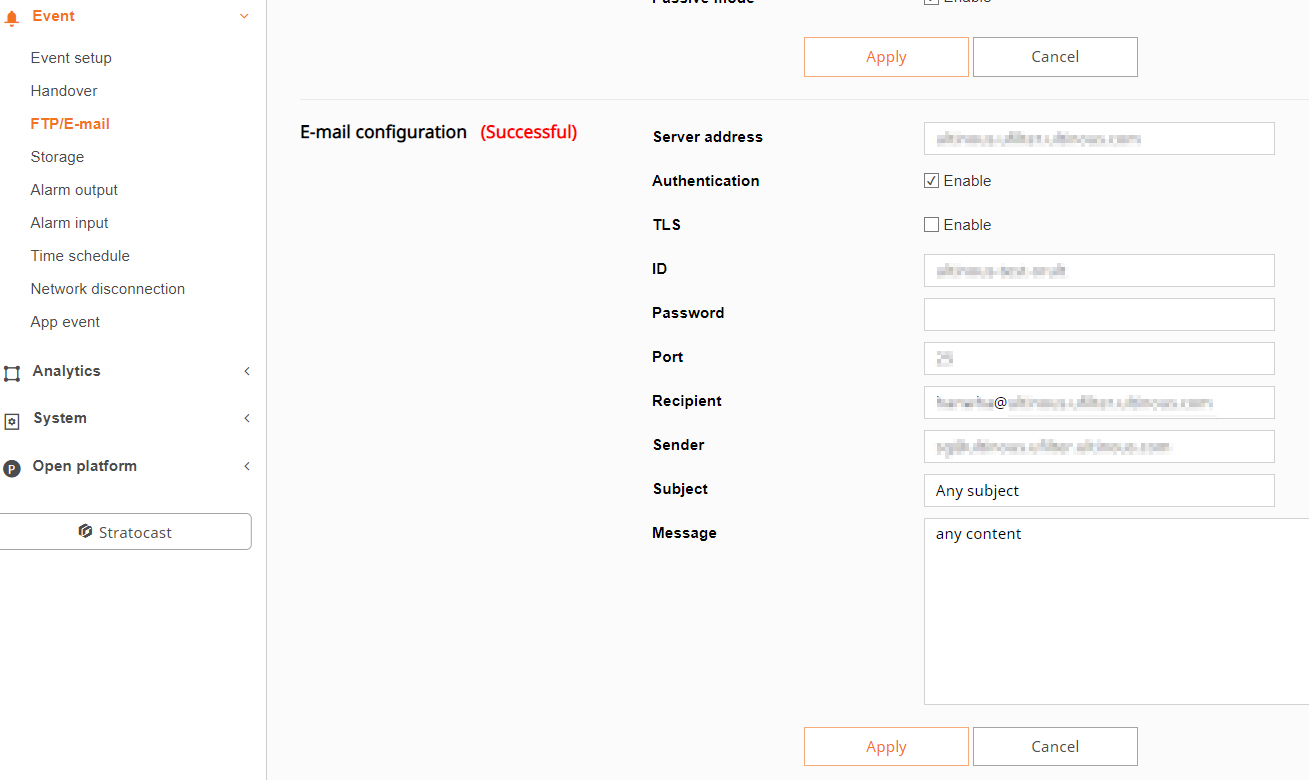
In the Event menu, select the FTP/Email submenu. Look for the E-mail configuration section.
Fill in the server settings according to your configuration. Make sure that Authentication is checked.
Use any Sender address, any Subject and any Message.
Click the Apply button.
Transfer Interval
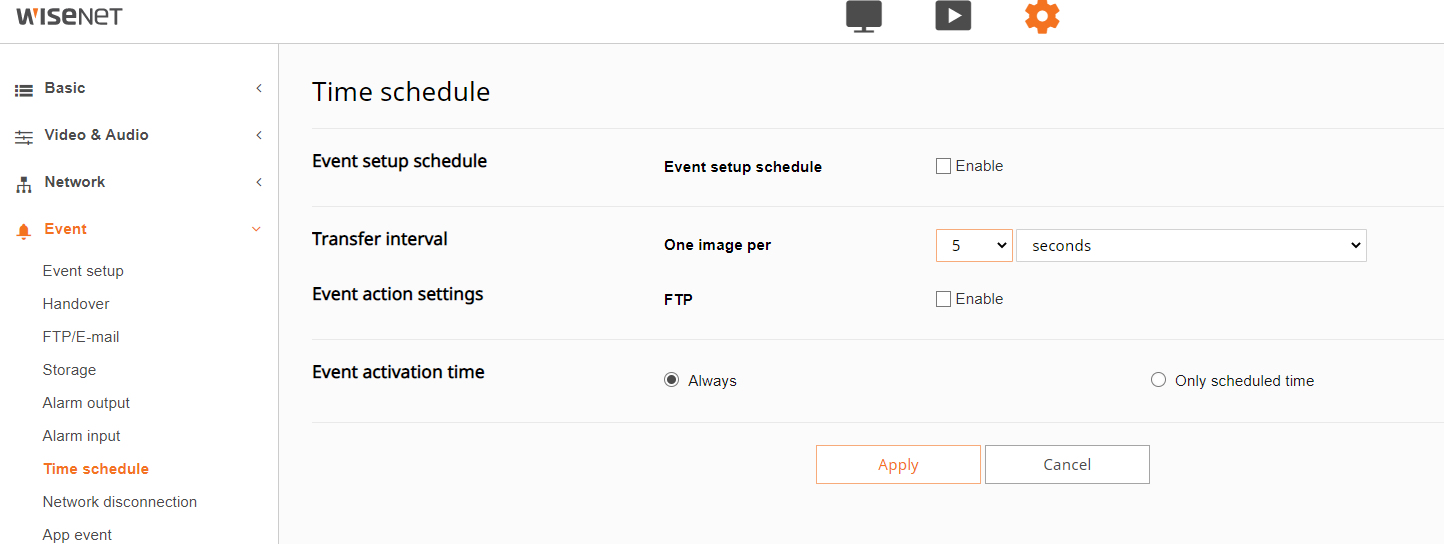
- In the Event menu, select Time schedule submenu. Look for the Transfer interval setting.
- Set the value to a relatively low amount, but no more than 2 seconds (e.g. 3 or 5 seconds).
- Click the Apply button.
All done. U-Filter should start receiving emails.