Multi Object Counter

Multi Object Counter is a tool for classifying and measuring the amount of the chosen type(s) of objects. Multiple cameras can be associated with a single Multi Object Counter - This enables the measurement of different object classes, as well as a single object type in two or more separate locations (such as counting the sum of cars in two parking lot areas) as well.
- Core technology: full body and vehicle detection.
- Compatible with fixed, PTZ, and thermal cameras.
- Areas of interest can be defined.
- Send data to third-party software.
- Multi-camera support.
The data produced by Multi Object Counters can be accessed by third-party tools - see the Counter API section for integration instructions - as well as in Ultinous AI Suite, in the Events screen.
New Multi Object Counter
- Scroll down to Counters, then choose Multi Object Counter by clicking on its box. Fill in the form, as follows:
- Name: A readable name of the counter for easy identification.
- Armed: The alarm can be deactivated here. Armed by default.
- Technical name: A unique name that identifies your Counter in the API.
- Add Camera: Select one or more cameras the counter should use from the list.
- You can add more than one camera for one counter, since you may want to see an aggregated sum of all objects counted, spread across different cameras.
- You may also add the same camera multiple times, with different ROI, Sensitivity and object type preferences.
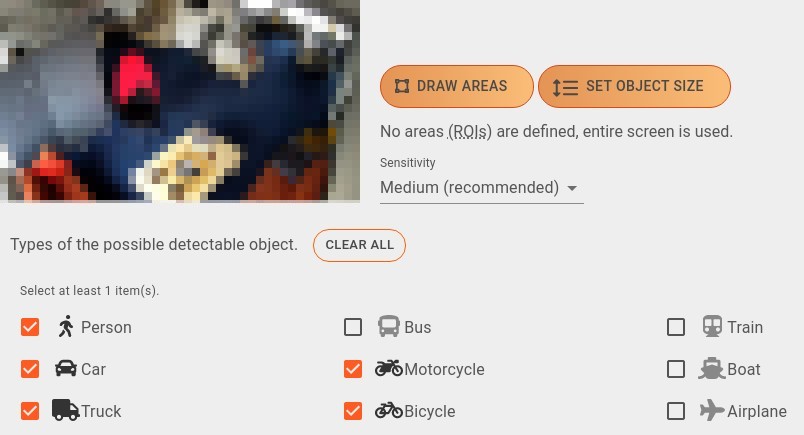
- Draw Areas (ROI) (optional): Sometimes the counter should be limited to a specific area of the video. If you would like to observe only a specific area, it can be determined here. Clicking this button makes the Camera Editor appear. Without ROI, the entire area will be observed.

Set object size (optional): If you have a good idea of what pixel range the detected objects would fall into, you can customise the minimum and maximum height size of detections, in pixels, here. This would ensure that only objects that fit into that range would get detected.
Move the the arrows by clicking and dragging them to help you determine the optimal values. Adjust the slider's endpoints on the bottom part of the screen to set the minimum / maximum values. Click Set sizes to save your changes, or Discard to cancel them.
Setting the minimum size below 50 would correspond to turning the parameter known in releases older than 2.1.0 as "Long-range detections" on. Enabling this will increase the detection range but will lower the analysis period to 1/5 of a second and increase the Analysis Slot usage by one.
NOTE: Take care that any object below or above the set range will NOT be detected, possibly resulting in missing incidents. It is good practice to set the minimum size slightly below, and the maximum size slightly above the desired amount.
For example: If using Ultinous AI Suite with a combination of radar and PTZ cameras, setting custom object sizes would result in detections only if the radar have detected movement - since setting the proper minimum size would rule out random noise causing false detections.
Sensitivity: The sensitivity of the detector can be fine tuned here. Lowering the sensitivity causes less false detections but decreases accuracy. Increasing it results in more alarms but may cause more false detections as well. The default sensitivity is Medium.
Object types: Choose any number of object types from this list. Click Clear all to reset your selections. Please select at least 1 category.
To add the same camera to the counter, click Clone (optional). You may keep your settings as you set them previously, or modify the clone to your liking. Click Change to swap your previously selected camera for a different one. Click Delete to remove your previously selected camera.
Aggregation frequency: The interval between aggregating the counted objects. Default is 5 seconds.
Click the Submit button to save your camera and its clones if you added any.
Google BigQuery (optional): The output generated by Traffic Counting can be exported and viewed real-time in Google BiqQuery databases: Tick this button to enable this feature. Type the name of your BigQuery Dataset and Table to which you would like to export data. Note that you are required to set your BigQuery credentials in the Control Panel as well. See the Google BigQuery guide for detailed instructions.
To check the counter's detections inside Ultinous AI Suite, you can do so by opening the live view of the corresponding camera(s) in Cameras.
The data produced by Multi Object Counters can be accessed by third-party tools - see the Counter API section for integration instructions - as well as in Ultinous AI Suite, in the Events screen.