Immix CS Integration
Immix CS is a Central Station Monitoring tool, capable of integration with Ultinous AI Suite, by sending the AI Suite's solutions' metadata to Immix, in e-mail format, with an optional snapshot of the detected incident attached.
NOTE: The following was tested on Immix's test environment, at https://testmydevice.immixprotect.com/devicetest
Before you start
Please make sure that you have:
A registered account for Immix CS.
Your cameras and at least one Solution registered in Ultinous AI Suite.
A working SMTP server for e-mail sending.
Immix CS Integration
Setup Immix Alarm Session
NOTE: The following was tested on the Generic Stream option.
Open the Immix CS test interface.
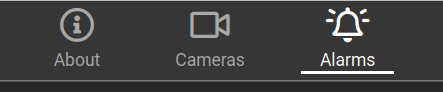
In the upper icon bar, click Alarms.
On the left sidebar, select the driver corresponding to your specific device or choose Generic Stream for a generic test solution.
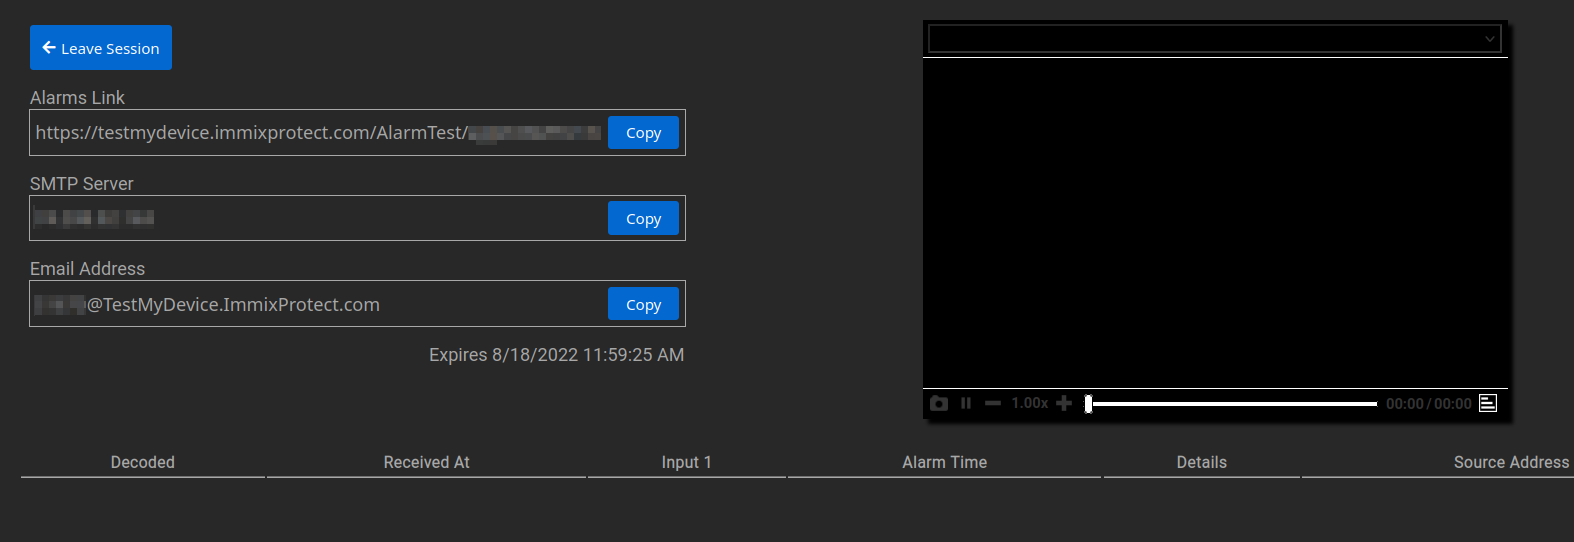
Click Create Alarm Session.
Immix has now generated the necessary data for the Ultinous AI Suite configuration. Copy the data in the SMTP Server and the E-Mail Address fields to the clipboard or otherwise note them down.
Connect Ultinous AI Suite with Immix
- In Ultinous AI Suite, open the Control Panel -> E-mail Settings. Setup your SMTP server according to the following:
- Sender e-mail address: The e-mail through which data will be sent to the Immix SMTP server.
- Server name: Fill in the field with the data copied from the SMTP Server field in Immix, above.
- Server port: The port number corresponding to your chosen sender email address.
You may leave the rest of the fields empty, or fill them in according to the needs of your server. Please refer to the E-mail sending guide for details, otherwise, proceed to the next step.
Go to Solutions -> Select the solution you would like to configure to edit it or register a new one.
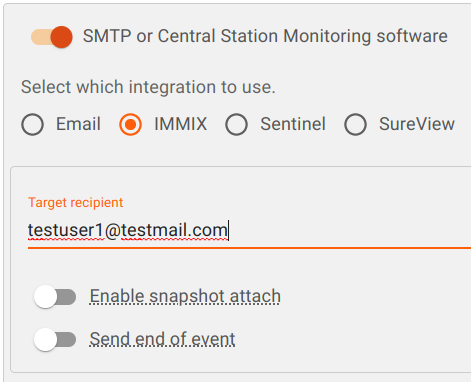
Scroll down to SMTP or Central Station Monitoring software -> tick its button.
Click the IMMIX radio button. Paste the contents of the E-Mail Address field generated by Immix in Step 5 above to the Target recipient field.
Enable snapshot attach: Tick this button to include a snapshot image of the incident sent to Immix.
Send end of event (for supported solutions): Tick this button if you would like to receive a special 'end of event' record in Immix, sent after 5 seconds of inactivity since the last alarm.
Click Save to submit your changes to the solution. It is now ready to send events to be viewed in Immix CS!
Repeat steps 2-5 for each of your Solutions from which you would like to send data to Immix.
Viewing incidents in Immix
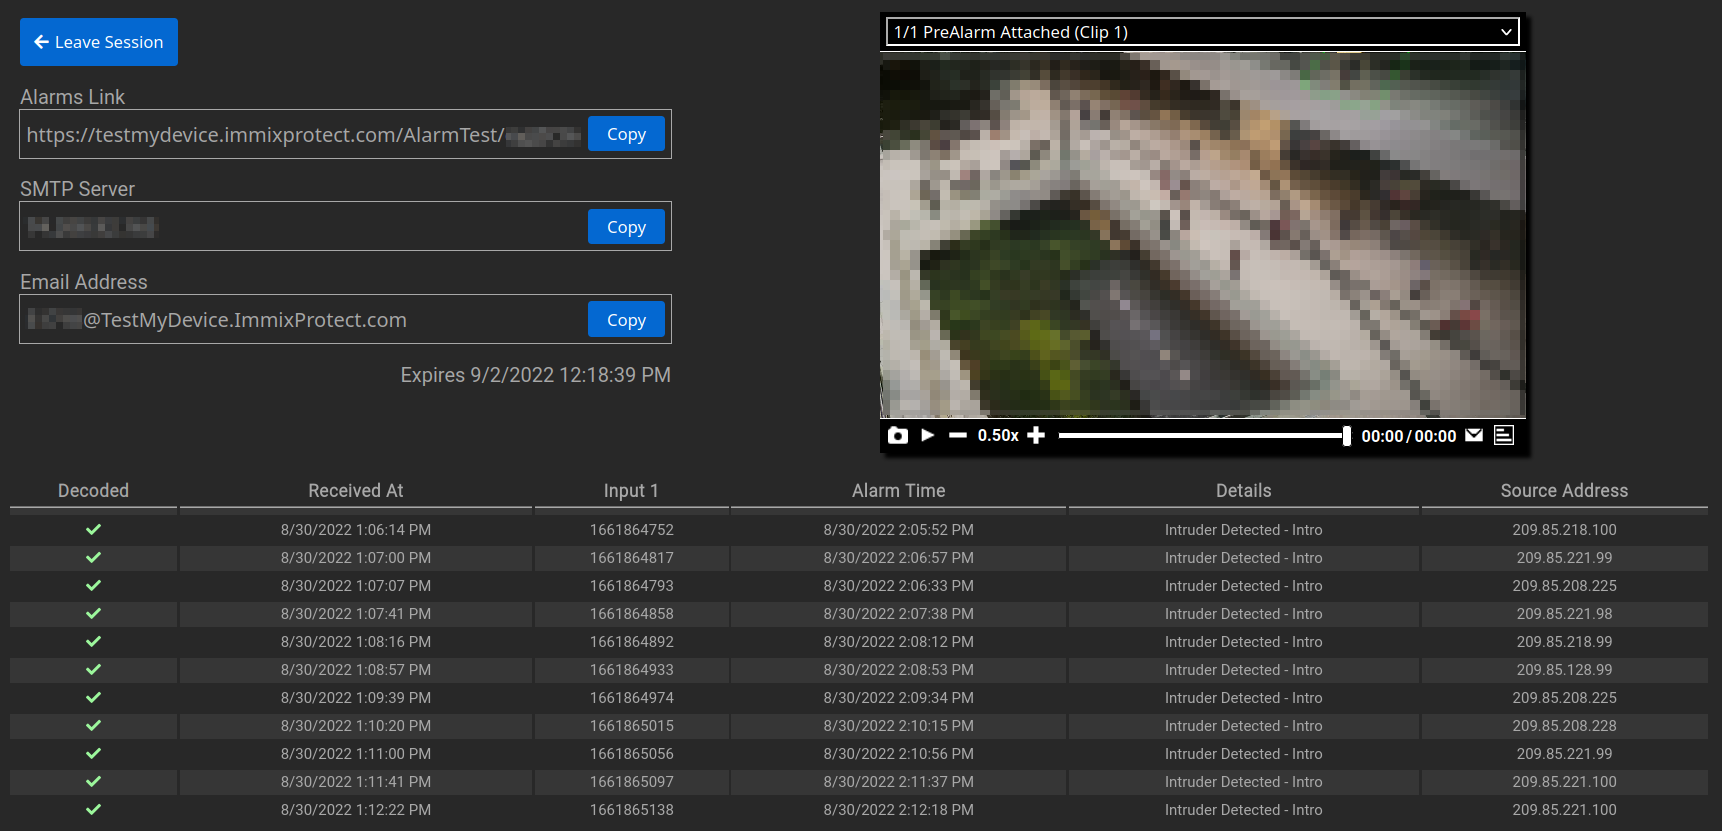
Once you receive an event from Ultinous AI Suite, it will appear as an entry in a list in the Immix Alarm Session screen.
The information under the Details column contains the type and name of the solution you set up in Ultinous AI Suite. Read on to find out what subject type corresponds to which solution.
If the Enable snapshot attach button had been enabled in the solution's settings in Ultinous AI Suite, a snapshot of the incident will be visible in the upper right corner of the Alarm Session screen, embedded in the video player.
List of solutions with corresponding subjects
Alarms received in Immix Alarm Sessions have one of the following identifiers in the Details column, corresponding to a specific solution type in Ultinous AI Suite - consult the table below for a complete list of them.
| Solution type in Ultinous AI Suite | Alarm Details in Immix |
|---|---|
| Crowd | Person Detected |
| Intrusion | Intruder Detected |
| Hazardous Area | Object Detected |
| Multi Object Detection | Object Detected |
| Zone Crossing | Object Direction |
| Loitering | Object Dwell |
| Stopped | Object Stopped |
| Wrong Direction | Object Direction |
| PPE | Person Detected |
| Fall Detection | Person Detected |
| End of event* | Logical Event* |
*If the Send end of event option is ticked during the solution's configuration in Ultinous AI Suite, an additional entry will appear in Immix as a Logical Event, sent after 5 seconds of inactivity since the last alarm.