Using the U-Filter Camera Editor
Basic Navigation
The scroll wheel zooms in and out of the canvas.
Middle-mouse button + drag moves the canvas. To reset to the center of the canvas, click the Go to Origin button. ![]()
The following functions are available at the top of the screen:
- Finish Editing and Exit button to save all changes and return to the Alarm page in Ultinous AI Suite.
NOTE: This only saves the changes made in the Editor - do not forget to press Save at the top of the Alarm page to add your changes to the Alarm itself.
- Discard Changes button to cancel all changes.
- Background, ROI and Measure buttons to open their respective tools and windows.
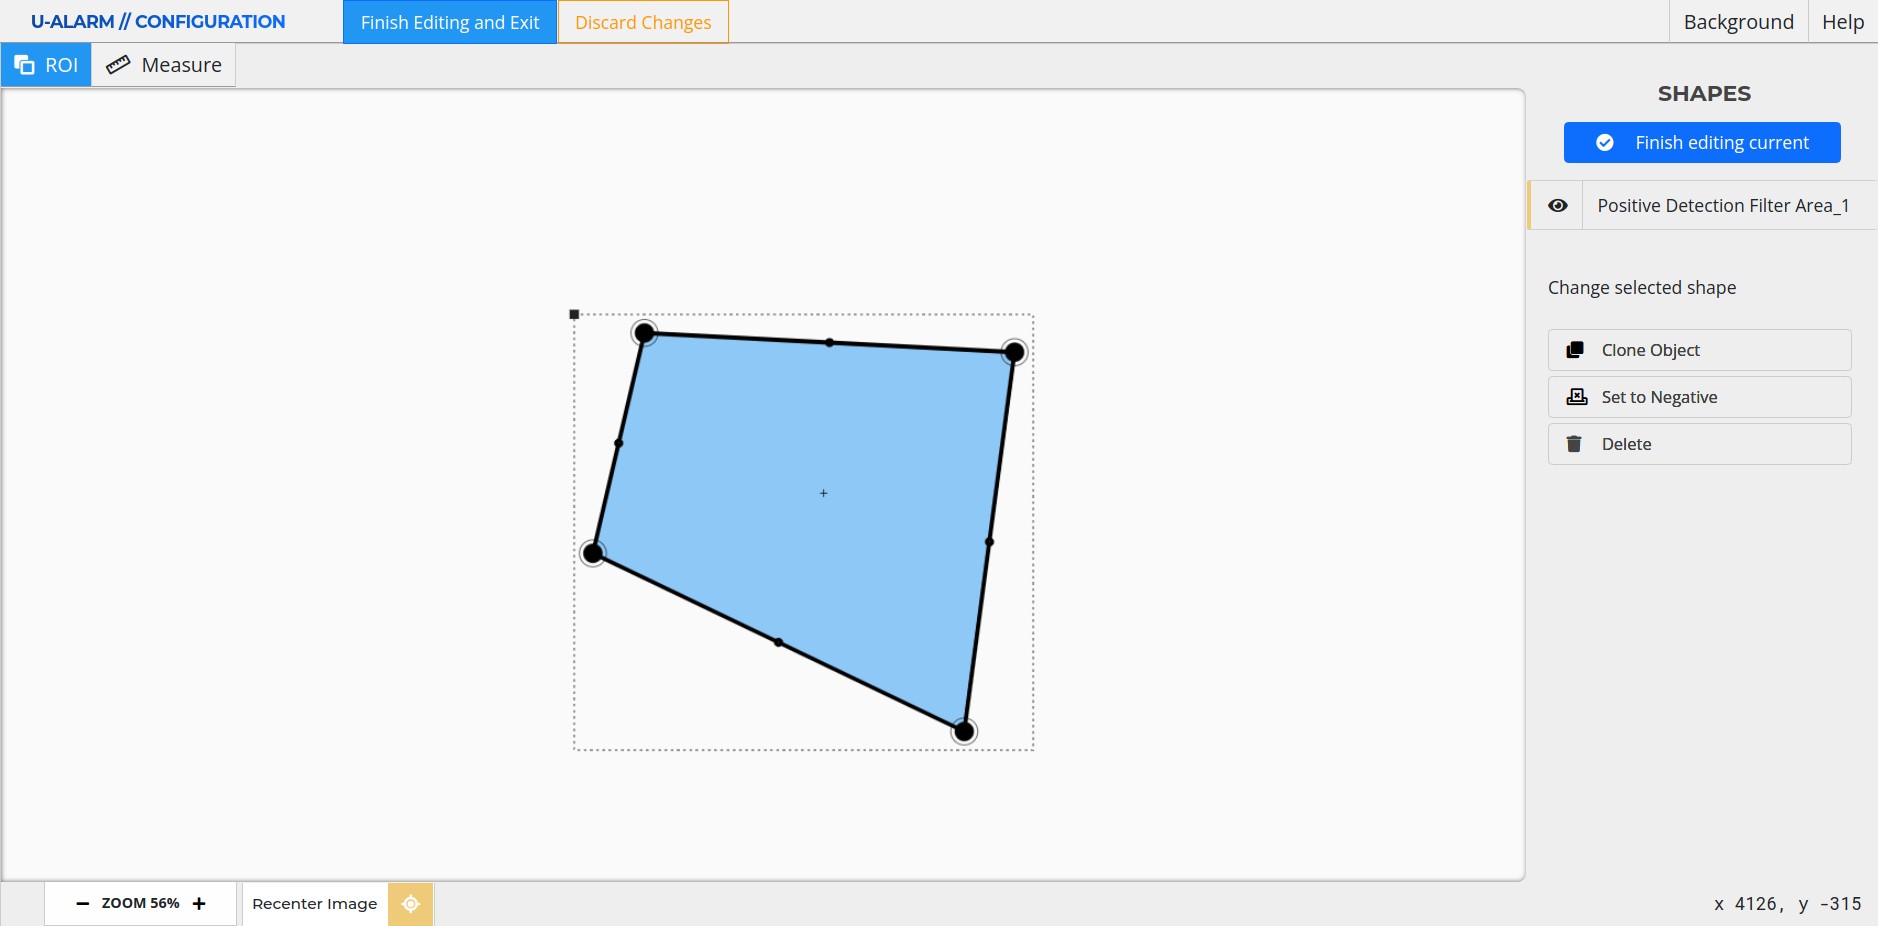
Shapes panel
- The list of created Areas are available here.
- Editing options for the currently selected Area can also be found here.
Drawing a new ROI
- Select the ROI tool from the top toolbar (selected by default).
- Define an area by simply clicking on the canvas to create nodes.
- Each step can be undone with a right-click.
- Click on the starting point to finish drawing the area (or double-click the last point).
- The new Positive ROI will appear in the Shapes list.
- You can draw more Areas: a camera can have an unlimited number of them.
- Click the Finish editing current button at the top of the Shapes panel. You can exit the Camera Editor by the Finish Editing and Exit button, or cancel all changes with the Discard Changes button.
Negative Areas (optional)
Negative Areas can be used when posters, billboards or other design elements contain people, causing false alarms. In a Negative Area all detections will be ignored.
- Double click a ROI (or select it from the Shapes list).
- Click the Set to Negative button. Clicking the button again will change the area back to positive.
- Click the Finish editing current button at the top of the Shapes panel or click anywhere on the background to exit edit mode.
- The Area will turn white, indicating that it is a Negative Area.
Edit an existing ROI
Double click a ROI (or select it from the Shapes list).
- Each node of the Area can be moved by dragging them with the mouse on the canvas.
- New nodes can be created by clicking on the mid-point of a section of the Area.
- The entire Area can be moved by dragging the black square at the top-left corner of the bounding box.
Click the Finish editing current button at the top of the Shapes panel or click anywhere outside the bounds of the shape to exit the edit mode.
Delete an existing ROI
- Double click a ROI (or select it from the Elements list).
- Click the Delete button.
Additional Tools and Options
Background
By clicking the Background button, a detachable window will open, giving you the following options:
- The opacity of the background.
- Refresh the background image.
- Upload custom background image.
- Configure the background grid.
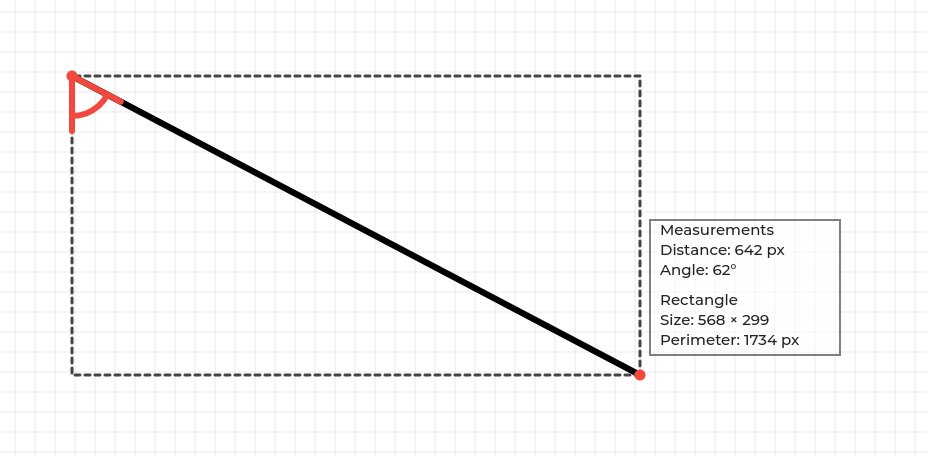
Measure
Enters into the Measuring mode. Left click sets the starting point and displays the distance between the starting point and the cursor location. It also calculates the size and perimeter of the rectangle where the ruler is the diagonal.