U-Filter Administrator Panel
In the U-Filter Administrator Panel, users with administrative privileges can manage and configure various aspects of the software. This includes adding, modifying, or removing users, assigning users to accounts, and monitoring account details. Additionally, administrators can view and keep track of the software's license information, such as the license duration and date of issuing. This guide provides you with step-by-step instructions on how to access and manage the Administrator Panel of U-Filter.
General Layout
The Administrator Panel is divided into three main sections: Users, Accounts, and License. You can access these sections by clicking on the corresponding buttons on the left-side panel.

Use the upper menubar to navigate to the U-Filter home screen or to log out.

Users
The Users page displays a table of all registered users with their ID number, username, e-mail address, role (administrator or configurator), and associated account(s).

Add new user
- Click the "Add User" button near the top of the table. A panel will appear on the right side of the screen.
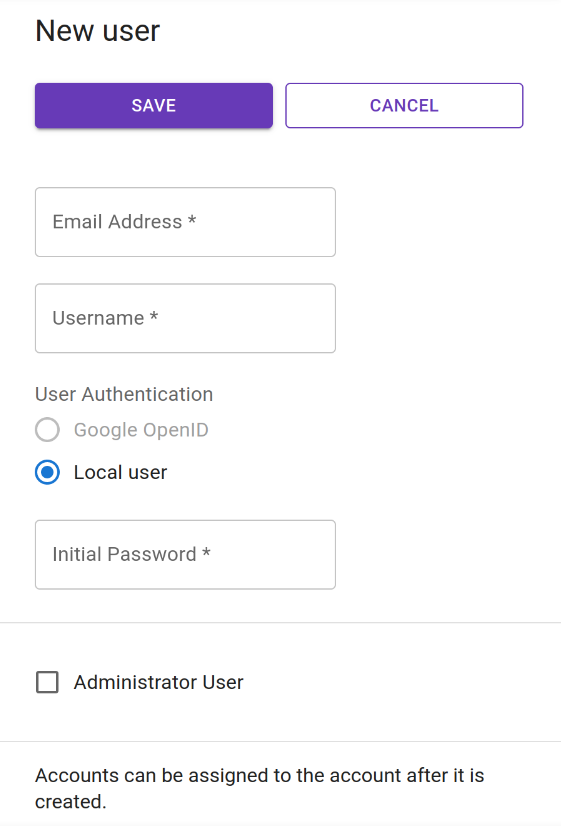
Fill in the user's e-mail address and username.
Choose the user authentication method by selecting either "Google openID" login or "Local user". Note that selecting "Google openID" will disable the "initial password" field as it uses its own password.
Note that registering Google OpenID accounts is not available in the current version of U-Filter.
If you wish to grant the new user administrator privileges, check the box next to "Administrator User".
Click the "Save" button to add the user or "Cancel" to discard the changes.
Edit user
- Click an existing user's row in the table. A panel will appear on the right side of the screen.
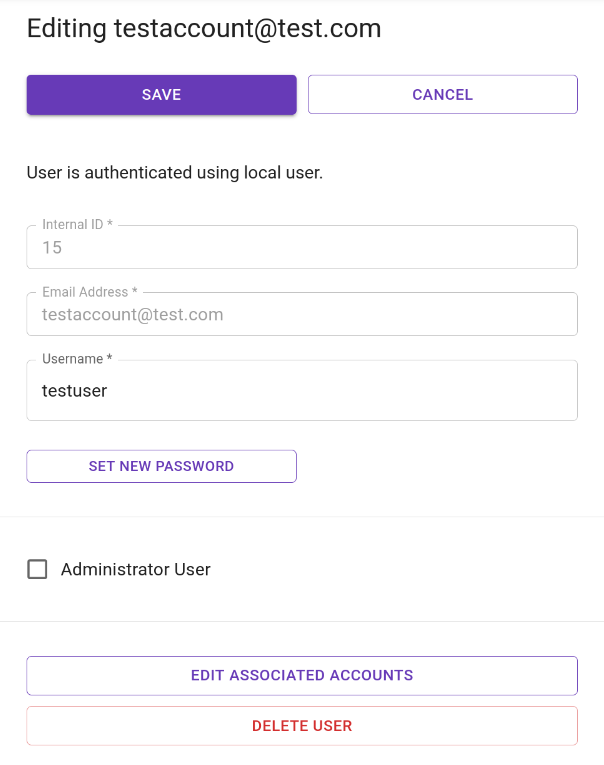
- Change the Username as you see fit.
The Internal ID and Email Address fields cannot be edited, as these values get generated on user creation.
Click the Set New Password button to type a new password for the user.
Tick or untick checkbox next to Administrator User button to change the user role.
Click the Edit Associated Accounts button to bring up the Account Association panel. Read below on how to modify site association settings.
Click Back to return to the User Editing panel.
Click the Save button to confirm your changes, or Cancel to discard them.
Click Delete User to remove the user. Click OK in the popup message to confirm deletion.
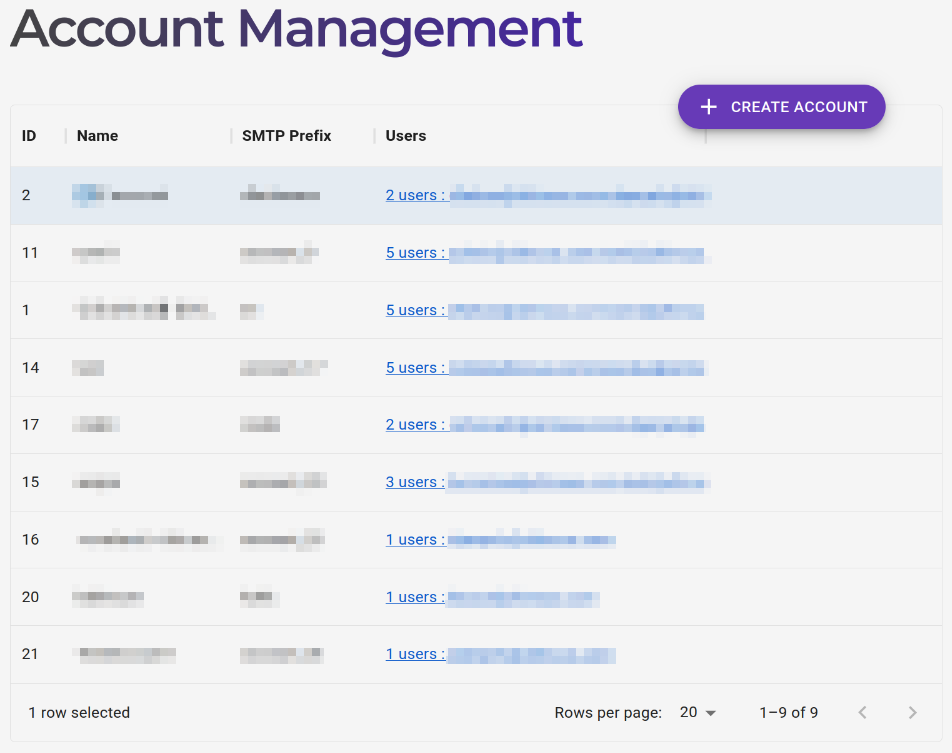
Accounts Page
The Accounts page lists existing accounts in a table. New accounts can be created here.
Create new account
- Click the Create Account button at the top of the table. A Create Account panel will appear on the right side of the screen.
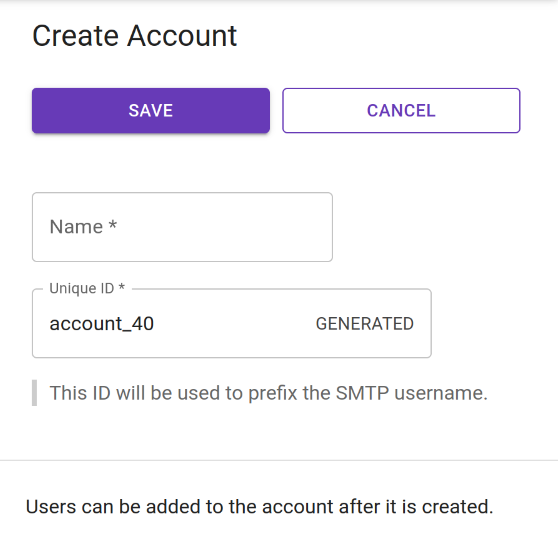
- Enter the account's Name and Unique ID, the latter to be used as the SMTP prefix of the account's e-mail address. A default Unique ID will be generated (can be modified).
The e-mail address with this prefix is used during the camera configuration process and can be viewed, along with other relevant information, in the U-Filter interface (see Step 6).
- Click the Save button to create the account or Cancel to discard your changes.
Associating users with an account:
- Click the "No users" entry of an account under the Users column. A panel will appear on the right side of the screen.
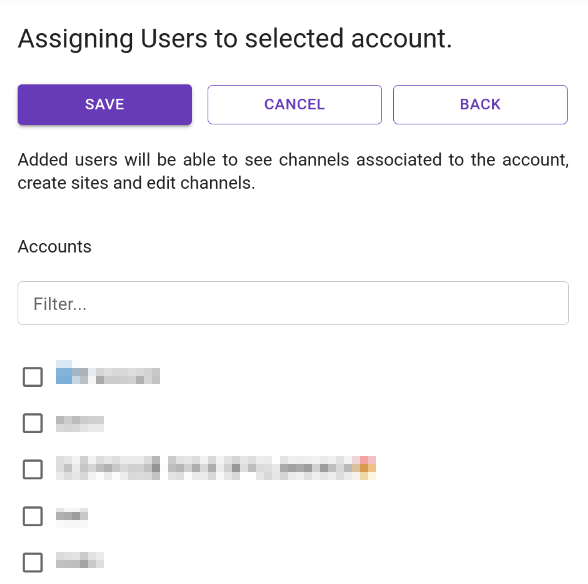
Use the text input field to filter the list of existing users.
Select users to add to the account by checking their checkboxes. Use the All, None, and Toggle buttons to help manage selections.
Click the Save button to confirm user associations or the Cancel button to discard them.
Edit account
- Click an existing account's row in the table. A panel will appear on the right side of the screen.
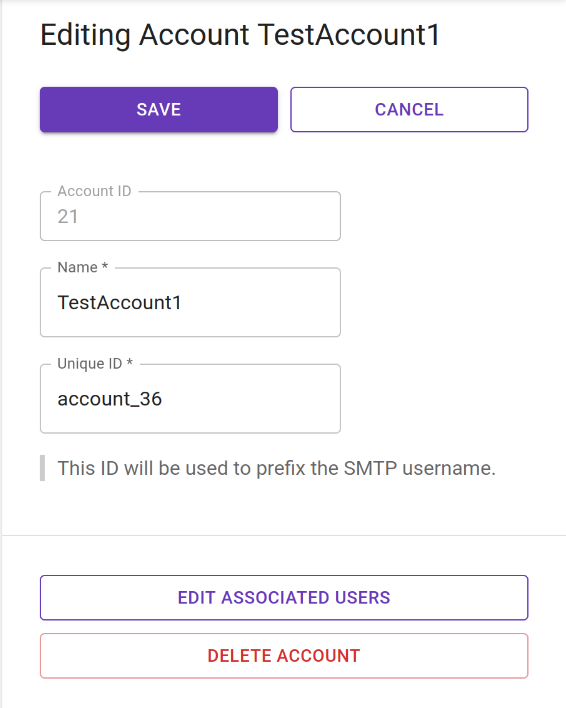
- Edit the account's Name and Unique ID according to your preferences.
The Account ID is not editable, as it is automatically assigned and is not used elsewhere.
Click the Edit Associated Users button. An Assign Accounts panel will appear on the right side of the screen, see above for configuration options.
Click Back to return to the Edit Account panel.
Click the Save button to confirm your changes or the Cancel button to discard them.
License Page
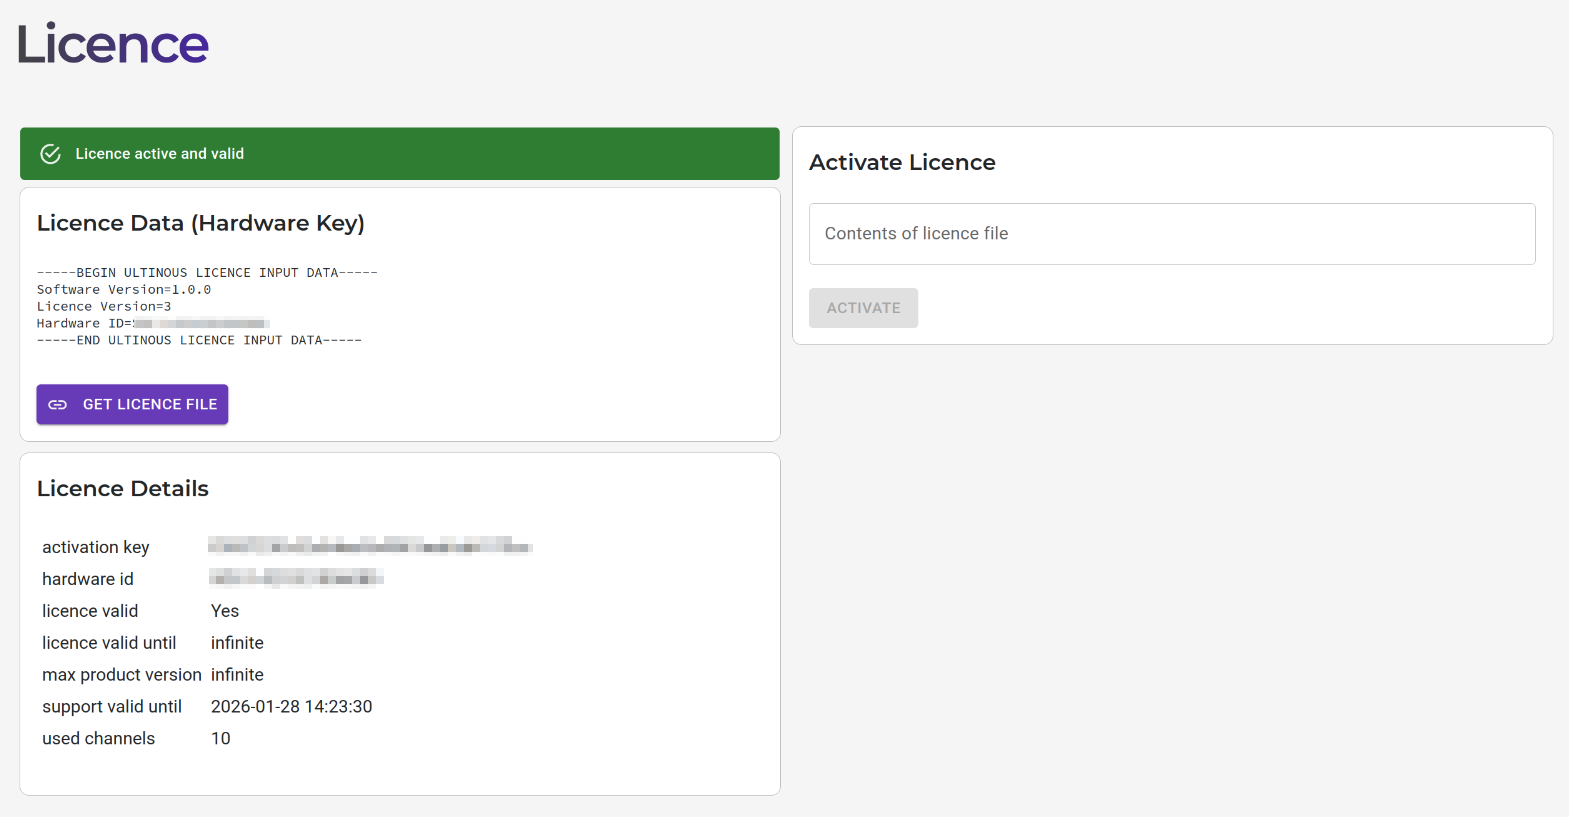
The License page displays information about the software's license, including duration and issuance date. Follow the instructions in the License guide to help you activate it.