Integration: U-Filter (Milestone XProtect)
Before you start
In this guide it is assumed that Milestone XProtect is installed on a computer in your network and you know how to configure it when using it without U-Filter. For further details, please visit the official site of Milestone.
Requirements:
- U-Filter Server is up and running and reachable from the computer network where Milestone XProtect is running. The network address of the U-Filter server is required for the process.
- Please make sure that each camera you would like to utilise U-Filter is registered in Milestone XProtect, as described in the Milestone documentation here: https://doc.milestonesys.com/2020R3/en-US/standard_features/sf_mc/sf_mcnodes/sf_3devices/mc_workingwithdevicegroups.htm?tocpath=XProtect%20VMS%20products%7CXProtect%20VMS%20administrator%20manual%7CConfiguration%7C_____12 .
- You have administrator privileges on the device running Milestone XProtect (both for Windows and within Milestone XProtect).
- If using the Essential+ edition of Milestone XProtect: make sure that the machine running Milestone XProtect is able to reach the Milestone License servers, as the Essential+ edition lacks an offline activation method.
I. Install the U-Filter Milestone Plugin
NOTE: Before installing the U-Filter Milestone Plugin, make sure to close both Milestone Smart Client and Milestone Management Client for all logged in users. Do the same for the U-Filter Milestone Plugin when upgrading to newer versions of it.
Download the U-Filter Milestone Plugin Installer from https://assets.ultinous.com/ufilter/U-Filter_installer_1.0.1.exe to the computer on which Milestone XProtect is installed.
Close Milestone XProtect and any Milestone services running on the computer.
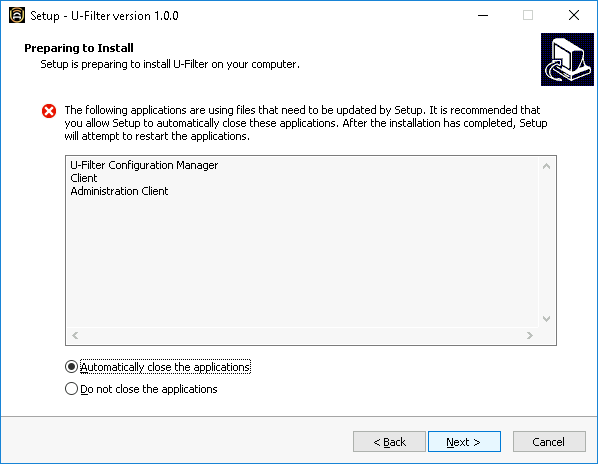
Start the installer.

Go through the installation steps. It is recommended to create a desktop shortcut.
NOTE: If you did not close Milestone XProtect before, the installer can try to close them. If closing some of these services is unsuccessful, retry it until it succeeds or close them manually (in the Windows Task Manager, for instance).
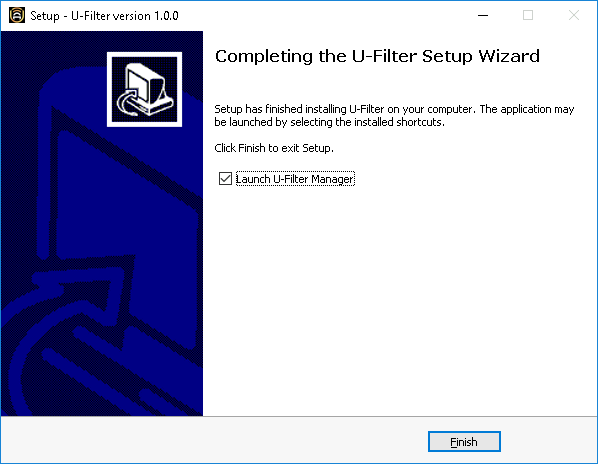
After the installation is complete you can launch the U-Filter Manager. Its icon will be visible on the system tray.
The icon indicates the following states:
 Running
 Pending
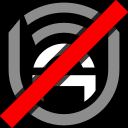 Stopped
II. Give access to Milestone XProtect
U-Filter requires access to Milestone XProtect, therefore a new user should be created with administrator privileges.
II. a. Create a User in Milestone XProtect
Open the Milestone XProtect Management Client.
Go to the Site Navigation panel => Security => Roles.
Click on Administrators in the Roles panel.

- Find the Users and Groups tab at the bottom of the Role Settings panel. Click the Add... dropdown and select the Basic user option.

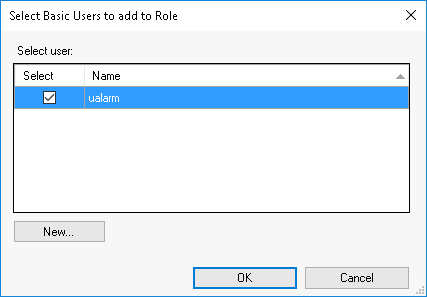
- In the Select Basic Users to add to Role pop-up, click the New button.
- A new pop-up appears. Fill in the form with new user credentials and click OK. Use a complex password with capital and small letters, numbers and special characters. Remember the password, as it will be used later in the U-Filter Manager.
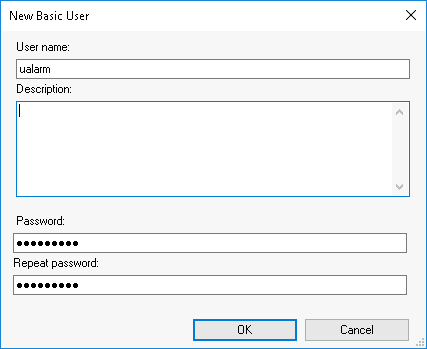
- Add this basic user to the Administrators by clicking OK.
II. b. Set the credentials for the U-Filter Plugin
Start the U-Filter Manager. If it is already started double click its icon on the system tray.
The U-Filter Manager is part of the U-Filter Milestone Plugin. Its icon indicates the following states:
- Running
- Pending
- Stopped
NOTE: If the icon can not be found, please start U-Filter Manager with its shortcut or from the Windows Start menu.

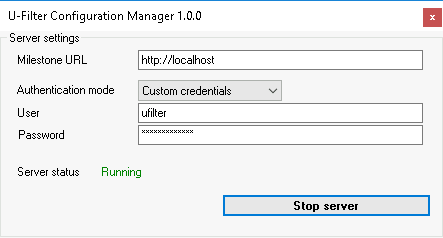
Type the URL of Milestone XProtect Event Server (usually this computer).
Set the Authentication mode to Custom credentials. Set the username and the password you have created in Milestone XProtect above.
As an alternative you can use the Default authentication for the current Windows user. This is only recommended for advanced users with system administrator skills.
- The current user should be able to login into Milestone XProtect and has Administrator privileges in Milestone XProtect.
- The current user should be authorized to run the U-Filter Manager service in the Windows Services settings.
When everything is set, click the Start Server button. The Server status will indicate its state, as Running.
NOTE: After you change any settings in Milestone XProtect, as described in chapter III, please restart the U-Filter Manager service by pressing the Stop server, then Start server buttons.
Done. You can close this window. Make sure that the tray icon indicates the service as running.
III. Configure input and output events for U-Filter
In this step we will create one or more Rules that define:
- which events in your existing security system should trigger filtering by U-Filter,
- how do we get samples from the camera streams.
In order to define such Rules we have to create its building blocks: After setting up the input for U-Filter, we will define the output events, which can later be converted to Alarms, E-mail or other types of notifications.
III. a. Setup the triggering event of your choice
Please make sure that you have read the chapter How does U-Filter work? at the beginning of this guide and that you understand what a "triggering event" is.
For this step, it must be ensured that a triggering event is available in Milestone XProtect.
- For setting up motion detection, please refer to the corresponding Milestone XProtect documentation about Motion detection at https://doc.milestonesys.com/2020R3/en-US/standard_features/sf_mc/sf_mcnodes/sf_3devices/mc_sitenavigationdevices.htm?#Motiontabdevices. You can set up the motion grid, sensitivity and more. Motion detection is reliable for detecting intruders, however it is liable to create a large number of false alarms. It is advised to use more advanced triggering events if possible for optimal resource consumption.
- If any other sophisticated events are available in your existing security system, like Person detection or Intrusion, now is the time to set them up. These events are typically triggered by a camera, another sensor or by a specific feature in Milestone XProtect. Most of such features can create an unacceptable amount of false alarms, which U-Filter can filter.
If the settings are finished, please proceed to the next paragraph.
III. b. Create a U-Filter configuration
Consult the table below for recommended configuration.
| Once | Start-Stop event | |
|---|---|---|
| Duration (seconds): | 3 | - |
| Analysis Frame Rate: | 1-3 | 1 |
| Cooldown (seconds): | 60 | 60 |
| Overload cooldown (seconds): | 120 | 120 |
| Request timeout (seconds): | 10 | 10 |
In the Milestone XProtect Management Client, go to the Site Navigation panel => MIP Plug-ins => U-Filter => U-Filter configurations.
Right click on the U-Filter configurations panel => Add new.
Fill the form. Create a Name for this configuration.
Set the server Hostname to the network address of the U-Filter Server.
Select the Forwarding mode depending on the event which will trigger the filtering. This choice will determine other setting options.
Understanding the Forwarding mode
Please make sure that you have read the chapter How does U-Filter work? at the beginning of this guide and that you understand what the "triggering event" is.
Triggering events can be single occurrences (like a Person detection) or events with a certain duration (such as Motion started / Motion stopped).
- Once:
If the triggering event of your choice is a single occurence with no end signal, please choose the
onceoption for Forwarding mode. In this case Video chunk size and the Analysis frame rate settings will determine the sampling. After the triggering event one or multiple number of snapshots will be sent one by one to the U-Filter server until a positive response is received from U-Filter OR until the last sample is sent (whichever happens first). The Video chunk size setting determines the maximum number of samples sent upon a single "triggering event". The sampling frame rate is determined by the Analysis frame rate setting. - Start-stop event:
If there is an event which determines the start of the possible incident and another one which determines the end of it, please choose the option
Start-Stop eventoption for Forwarding mode. In this case In this case the Cooldown and the Analysis frame rate settings will determine the sampling. After the triggering event occurs, snapshots will be sent one by one to the U-Filter server until another event determining the end of the incident is triggered. The sampling frame rate is determined by the Analysis frame rate setting. Upon a positive response from U-Filter, it is possible to avoid continuous event sending for a while. This duration is determined by the Cooldown setting. This feature may use a lot of CPU resources, especially if U-Filter uses a large amount of cameras in this Milestone instance - If you experience performance issues, consider choosing theonceoption instead.
- Once:
If the triggering event of your choice is a single occurence with no end signal, please choose the
Duration (only applicable to the Once forwarding mode): Sets a duration for the analysis time.
Set the Analysis frame rate to determine how many snapshots get sent to be analysed by U-Filter, per second. It is recommended to keep this at a low value.
Set Cooldown to the number of seconds that have to pass between analysis periods. No snapshots will be sent from the triggering camera during this timeframe between events.
Overload cooldown: In case the U-Filter server gets overloaded with requests, this parameter controls how many seconds has to pass until new ones get accepted.
Set the Request timeout depending on how much time a single request should wait at maximum for filtering. It is recommended to set it to 10. After that time elapses without reply, the U-Filter server is considered to be busy. However, unfiltered events are not lost: they can be investigated as
U-Filter unfilteredAnalytic events.Class Settings: Select the object types of your interest by setting their Sensitivity from OFF up to Very High. Tick Moving only to filter stationary objects.
Click Save.
NOTE: If you would like to use different triggering events in your system for different cameras, you should create multiple U-Filter configurations. Repeat all steps in this paragraph for each configuration you create.
III. c. Create Rules for filtering
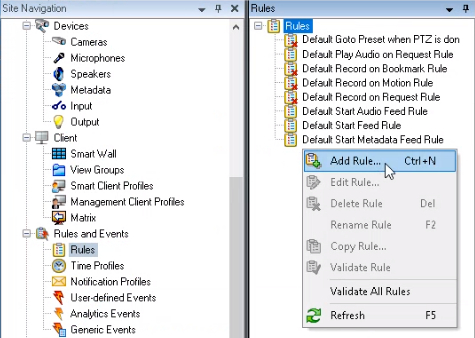
- In the Milestone XProtect Management Client, go to the Site Navigation panel => Rules and Events => Rules.
- Right-click on the Rules panel => Add Rule
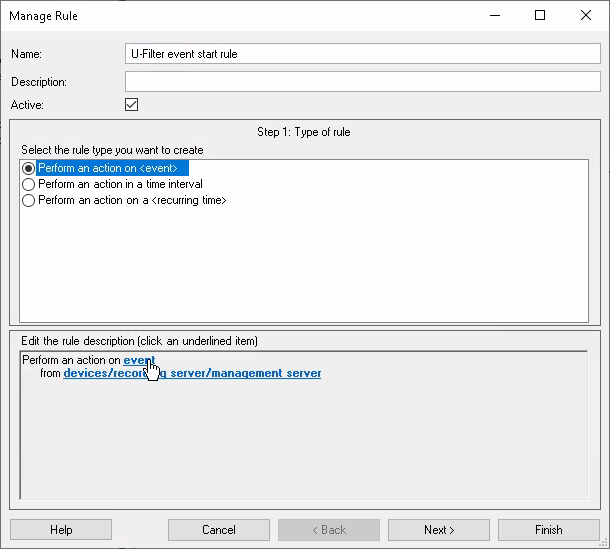
Set any Name eg.
U-Filter event start rule.As the Type of rule, select Perform action on event. Click on the blue underlined "event" word in the lower panel.
In the Select an Event pop-up find the triggering event of your choice in section III. b. Click the event then click the OK button.
In order to use Milestone XProtect's built-in Motion detector choose Events => Devices => Predefined Events => Motion Started.
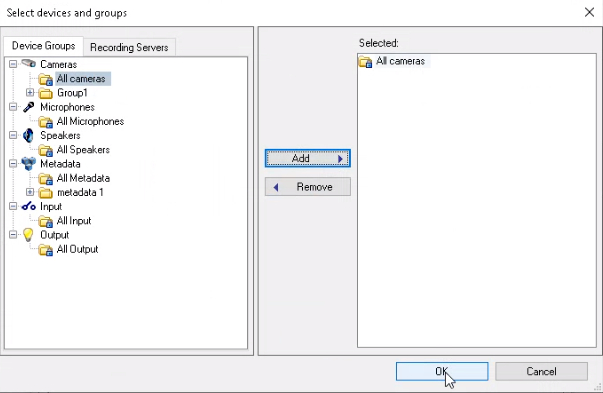
In the Manage Rule pop-up click on the blue underlined "devices/..." line in the lower panel (after "from").
In the pop-up select Cameras => All cameras. Click the Add button. Click OK.
You can choose any subset of your cameras in this step which should use the same triggering event for filtering. Make sure that one camera has only one triggering event and rule.
Click Next.
Skip the Conditions Step (2). Click Next again.
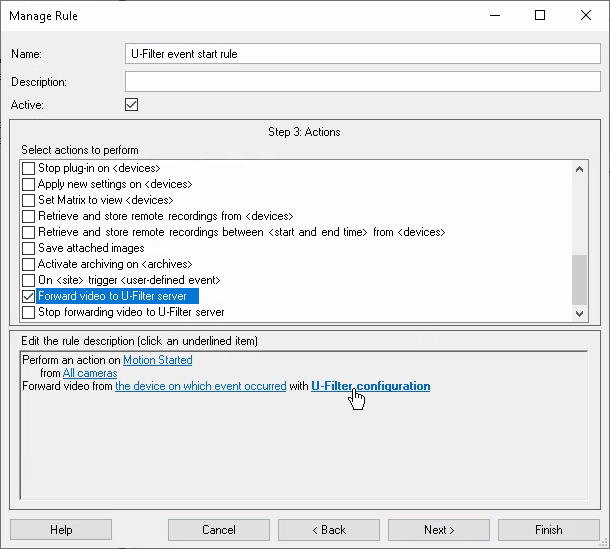
In the Actions Step (3) select Forward video to U-Filter server. Click on the blue underlined "Camera" word in the lower panel.

In the pop-up, select Use triggering device. Click OK.
Click on the blue underlined "U-Filter configuration" word in the lower panel. In the new pop-up, select a U-Filter Configuration you have created in chapter III. b. Click the Add button and click OK.
Click the Next button.
In the Stop Criteria (4) step, select the No actions performed on rule end option. Click Finish.
If the U-Filter Configuration you have created in chapter III. b. uses
onceas a Forwarding Mode, you are ready with creating the rules. However, if the Forwarding mode was set toStart-Stop event, then another Rule must be defined in order to stop sending events. To do so, create a new rule by repeating the steps of this chapter with the following exceptions:When selecting a triggering event in the Select an Event pop-up, select a different event which is associated to the end of a potential incident.
To use Milestone XProtect's built-in motion detector, choose Events => Devices => Predefined Events => *Motion Stopped*.
Actions Step: select Stop Forwarding video to U-Filter server.
The selected U-Filter configuration must be identical to the starter event's U-Filter configuration.
You can define multiple rules, depending on how many types of triggering events you would like to exploit. After you have a rule for each camera, you can proceed to the next chapter.
NOTE: If you update any of these Rules later on, please make sure that you restart the U-Filter Manager server (see chapter II.b for more details).
III. d. Create output Events for U-Filter
U-Filter will eventually emit events as its output upon confirmed or rejected intrusions, server overloads or errors.
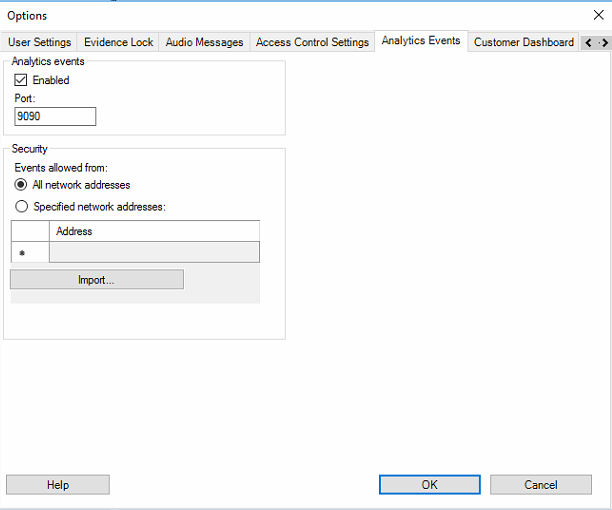
- In the Milestone XProtect Management Client, open Tools in the upper menu bar => Options => select the Analytics Events tab.
- Under Analytics events, tick the box beside Enabled then press OK.
- Go to the Site Navigation panel => Rules and Events => Analytics Events.
- Right click on the Analytics Events panel => Add New.
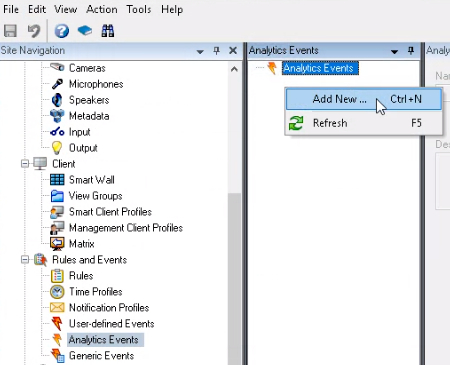
The name should be
U-Filter.Note: It is very important to set this exact name without the dot or any white spaces. The same applies to the other two U-Filter analytics event names, below.
Click the Save button in the top left corner or press Ctrl + S to save.
Repeat the steps of this paragraph with all event names listed below.
U-Filter creates events not only when an incident is confirmed but on other occasions as well. These are the following:
U-Filteris the name of the default positive event. Events with this name are triggered upon intrusions confirmed by U-Filter.U-Filter negativeis emitted when U-Filter did not detect any intruders on the image. This event has testing or debugging purposes.U-Filter unfilteredis triggered whenever the U-Filter server responds with an error. This can happen if the U-Filter server was too busy to fulfil the filtering request or if the server is unhealthy. If you can not afford to lose any requests, it is recommended to register this event.NOTE: If you modify any of these events, make sure you update all corresponding Alarms, Rules and other dependencies.
IV. Using the output of U-Filter
At this point, 3 types of U-Filter events are available in Milestone XProtect. Feel free to use these as you wish. In this chapter you will learn the most common ways of usage.
IV. a. Convert U-Filter events to Alarms
Now an Alarm has to be configured in Milestone XProtect.
In the Milestone XProtect Management Client go to the Site Navigation panel => Alarms => Alarm Definitions.
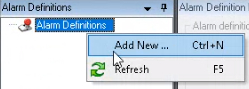
Right-click on the Alarm Definitions panel => Add new.
Fill the form. Make sure that the alarm is Enabled.
Set any Name for the alarm. This alarm will represent positive notifications coming from U-Filter.
Set the Triggering event to Analytics Events, then set U-Filter in the drop-down list below.
If you would like to receive and monitor
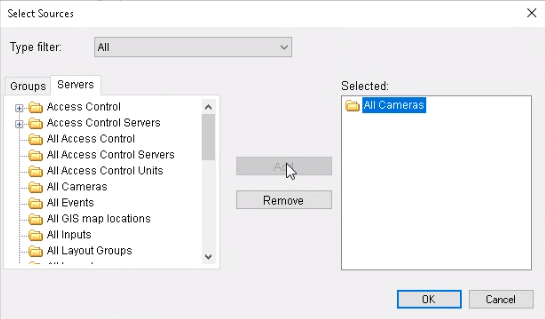
U-Filter negativeandU-Filter unfilteredevents coming from U-Filter, create a separate Alarm for each by repeating the steps in this chapter.At the Sources setting, click the Select... button. A pop-up will appear.
Click on the Servers tab. Select the All Cameras node and click the Add button. Click OK.
You can choose only a subset of these cameras too.
If you are familiar with Milestone XProtect, you can configure the rest of the settings as you wish or leave them as they are.
Click the Save button in the top left corner.
All done. You will receive alarms in the Alarm Manager.
IV. b. Receiving alarms by e-mail
Besides the Alarm Manager, Milestone XProtect has an additional way of viewing received alarms: in e-mail format with optional image and/or video attachments.
Follow the steps below to have a working e-mail notification setup.
Mail server
- In the Milestone XProtect Management Client, go to the Options in the upper menu bar => Mail Server.
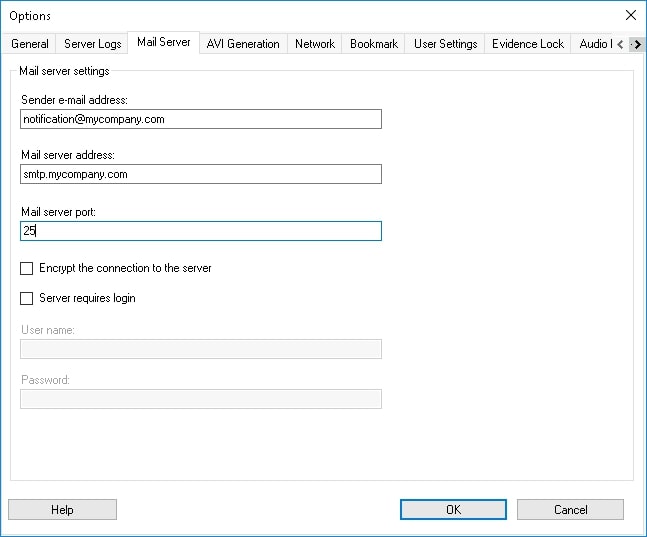
- Type in the sender address.
- Type in the SMTP address of the sender in Mail server address.
- Click OK.
Notification Profile
Now let us create a profile for sending the e-mail notifications.
- In the Milestone XProtect Management Client go to the Site Navigation panel => Rules and Events => Notification Profiles.
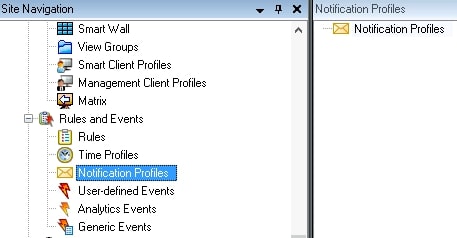
- Right-click on the Notification Profiles icon in the right-side panel => Add new.
- Set U-Filter email as the Name of the profile. You may fill the Description field as well (optional).
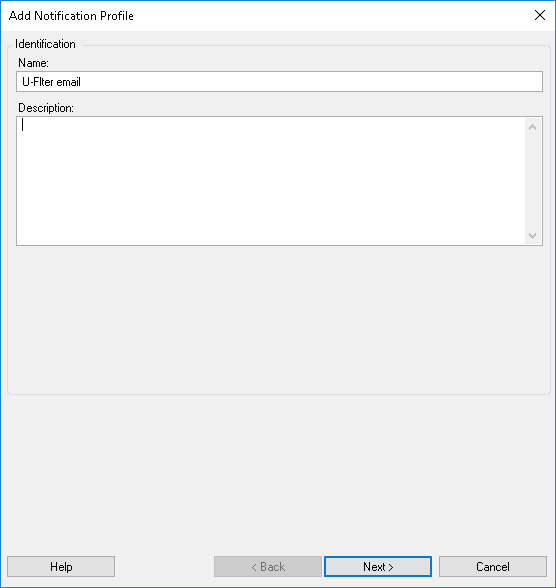
- Click Next.
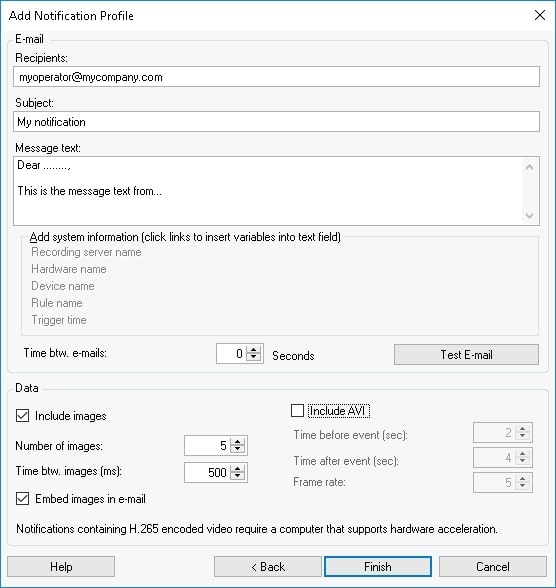
- Fill in the Recipients field with the e-mail addresses of your recipients, separated by semi-colons.
- Set any name for the e-mail Subject.
- Type in any text for the e-mail.
Optional:
By clicking on any of the items under Add system information, the e-mail body will automatically include them as additional information. You may also set a minimum time interval between the e-mails sent, in seconds.
Under Data, you may add and configure images and videos (the latter in AVI format) of the alarms by ticking their respective boxes. You can include the images as attachment, or embedded in the e-mail by ticking the Embed images in e-mail box.
- If you would like to test the settings you just configured, click Test E-mail.
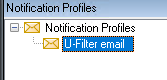
- Click Finish to save the profile, which will appear under Notification Profiles of the Site Navigation Panel.
E-mail Rule
- In the Milestone XProtect Management Client, go to the Site Navigation panel => Rules and Events => Rules.
- Right-click on the Rules panel => Add Rule.
- Set any Name.
- In the Type of rule Step (1), select Perform action on event. Click on the blue underlined "event" word in the lower panel.
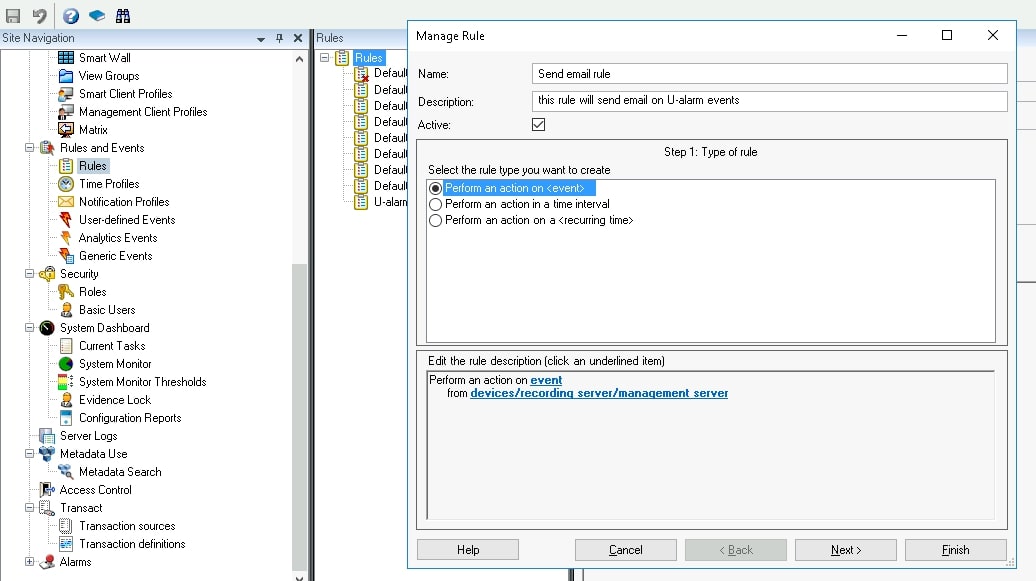
In the pop-up, select Events => Analytics Events => U-Filter.
If you would like to use other events coming from U-Filter, create a separate Rule for each one by repeating the steps in this chapter.
Click OK.
Click on the blue underlined "devices/..." line in the lower panel (after "from").
In the pop-up, select Cameras => All cameras. Click the Add button. Click OK.
You can use any subset of your cameras.
- Click Next.
- Skip the Conditions Step (2). Click Next again.
- In the Actions Step (3), select Send notification to profile. Click on the blue underlined "profile" word in the lower panel.
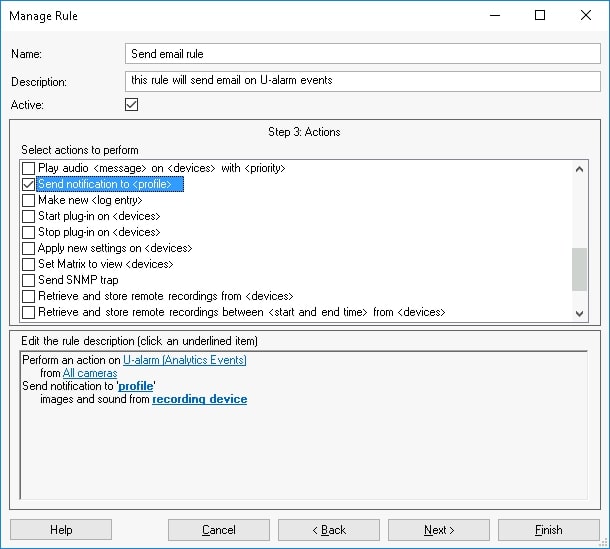
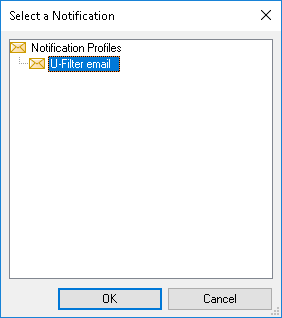
- In the pop-up, select U-Filter email under Notification Profiles. Click OK.
- Click on the blue underlined "recording device" word in the lower panel.
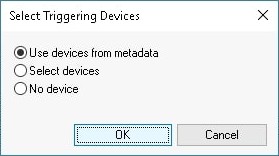
- In the pop-up, select Use devices from metadata. Click OK.
- Click the Next button.
- In the Stop Criteria (4) step, select No actions performed on rule end.
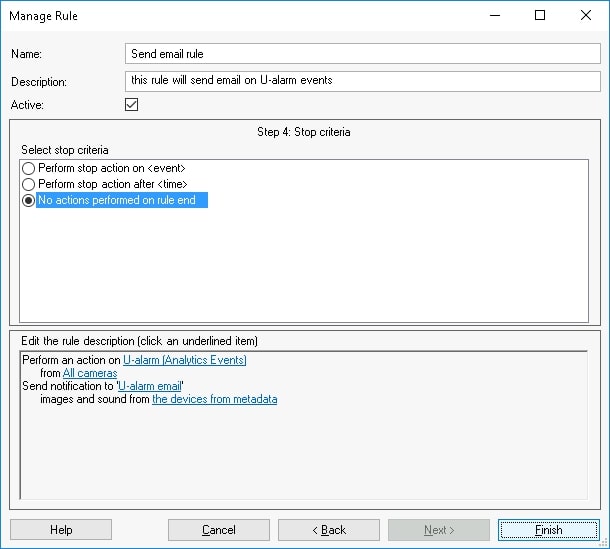
- Click Finish. The new rule is created and Milestone XProtect is ready to send alarms via e-mail from U-Filter.
All done! Recipients will receive emails upon a triggered alarm.
V. Receiving alarms in Milestone XProtect
V. a. Alarms through the Alarm Manager
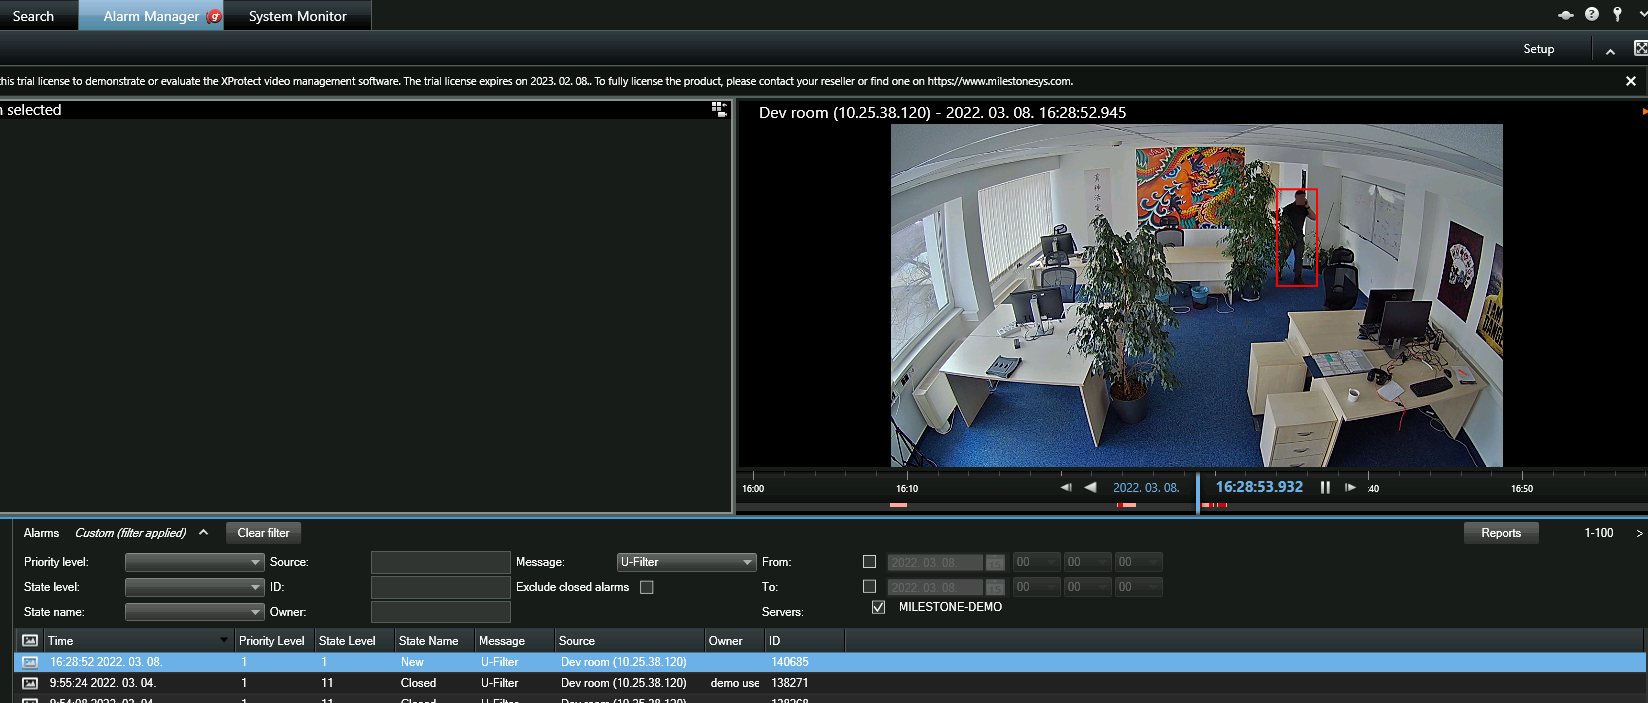
Whenever an Alarm is triggered by U-Filter, it should be visible in Milestone XProtect Smart Client under the Alarm Manager tab with annotations.
NOTE: As of now, the Alarm Manager is only available out of the box in editions Express+ and above. In Essential+, receiving alarms are possible either by E-mail notification or by manually creating a view to replicate the functionality of the Alarm Manager.
The metadata in the alarms:
- Name: The name of the alarm in Milestone XProtect.
- Message: U-Filter, U-Filter negative or U-Filter unfiltered (cannot be changed).
V. b. Alarms via E-mail
Recipients are receiving alarms according to the E-mail notification settings in Chapter IV. b.
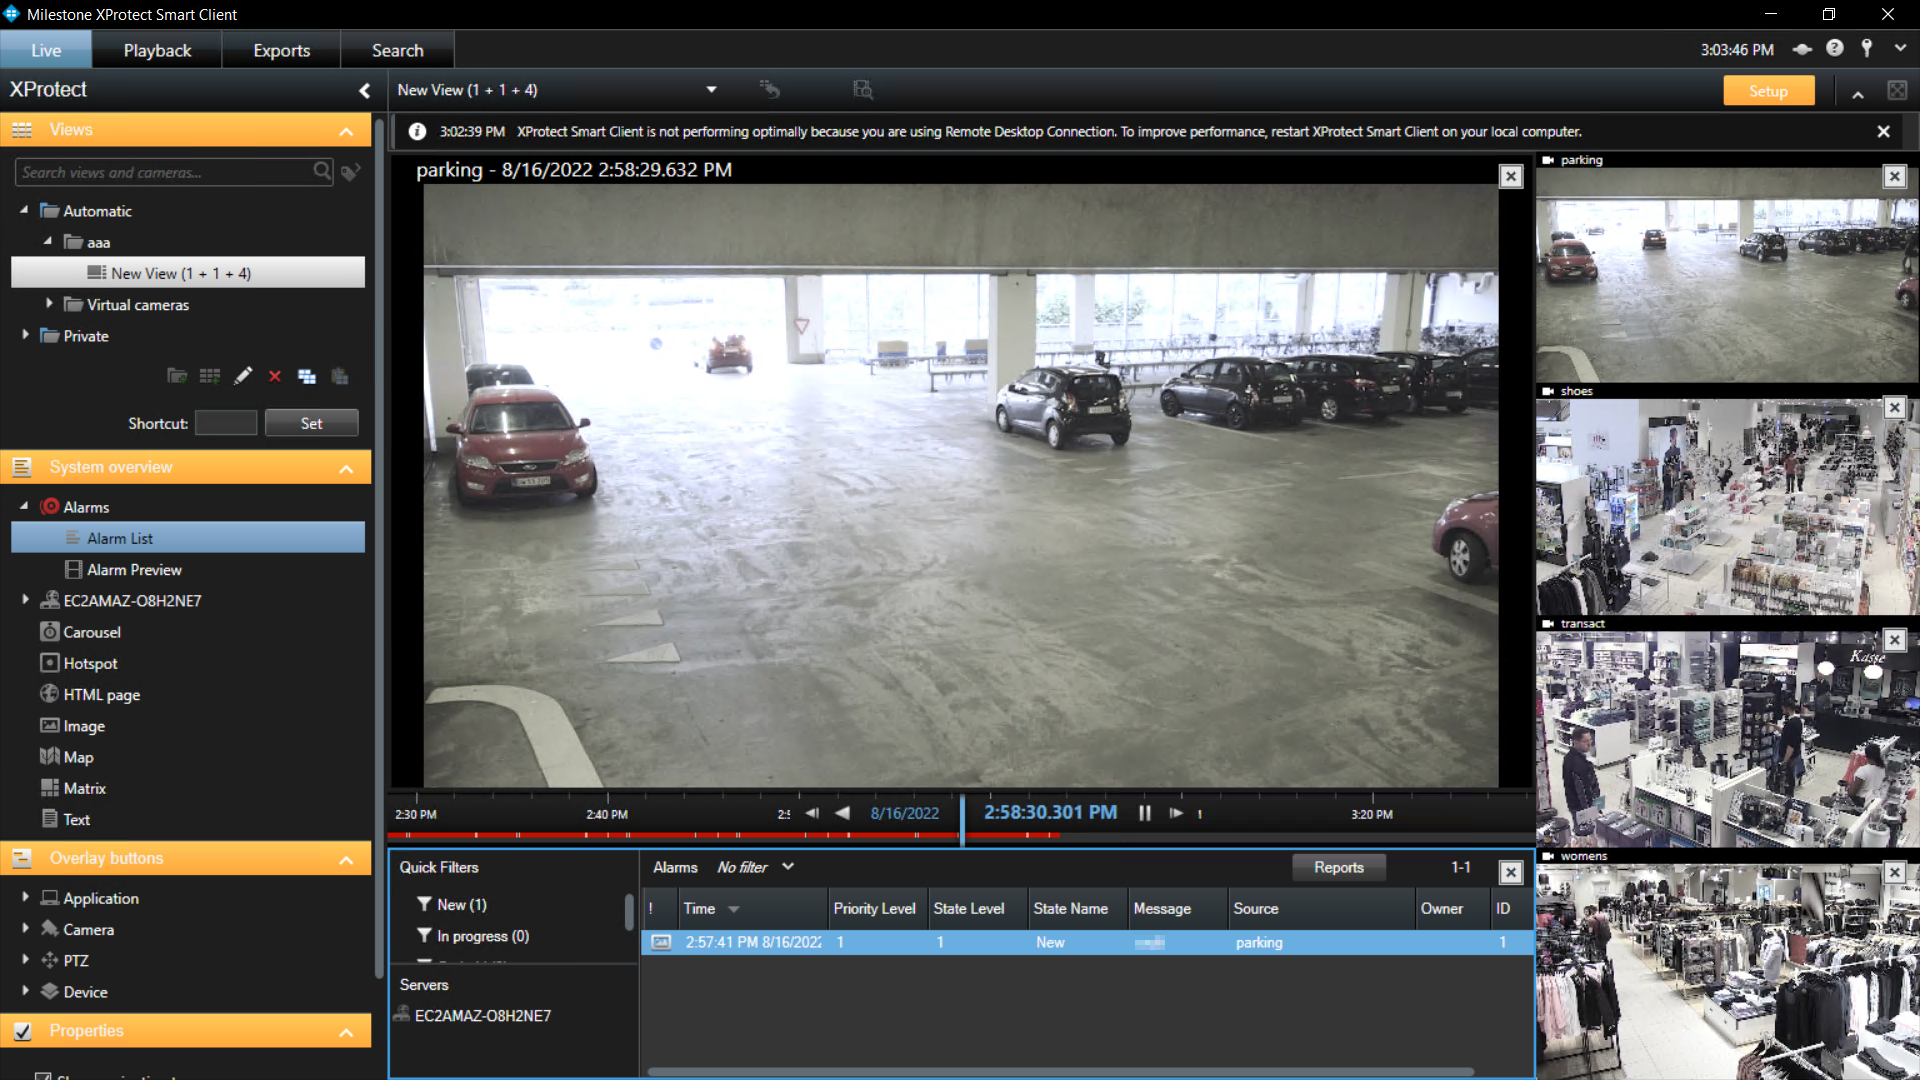
V. c. Creating a custom view in Smart Client
This method could be useful if using the Essential+ edition of Milestone XProtect, which lacks the Alarm Manager - follow the steps below to replicate its functionality. In editions above Essential+, you do not need to do this.
- In the Milestone XProtect Smart Client, open the LIVE tab of the window.
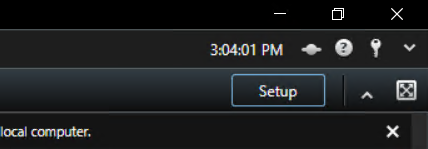
- Click the Setup button in the upper right corner of the window -> Certain elements of the interface will turn orange, indicating that they are now editable.
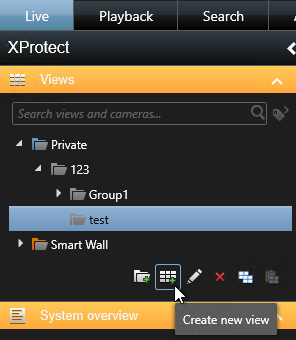
- On the left sidebar, select a View Group -> click Create new view. Choose any layout that contains at least one wide rectangle; in this example, layout 1+1+4 under category 4:3.
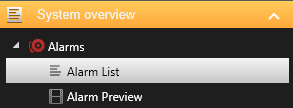
- On the left sidebar, under System overview, open Alarms -> click and drag the Alarm List and Alarm Preview items into the wide rectangles you created in the above step (into the two left-side rectangles in our example of a 1+1+4 grid).
From the Camera menu on the left sidebar, drag any cameras of your choosing into the remaining rectangles.
Click the Setup button in the upper right corner of the window to exit editing and save your changes to the interface.
VI. Support
Please visit our support page on https://ultinous.atlassian.net/servicedesk/customer/portals or contact your account manager.