Genetec Integration
Ultinous AI Suite allows for integration with the Genetec Security Center application suite, in order to receive and review Ultinous AI Suite generated events in Genetec Security Center. Configuration is done via both the Genetec Security Center Config Tool and Ultinous AI Suite - follow the steps laid down below for complete integration.
Before you start
In this guide it is assumed that Genetec Security Center is installed on a computer in your network and you know how to configure it when using it without Ultinous AI Suite. For further details, please visit the official site of Genetec.
Make sure that all your Solutions you would like to receive events from are registered and set up correctly in Ultinous AI Suite.
User management and access control
Ultinous AI Suite requires access for integration with the Genetec Security Center, therefore a new user should be created with administrator privileges.
In the Genetec Security Center Config Tool, click the
 button in the upper left corner of the window.
In the Administration category, select User Management.
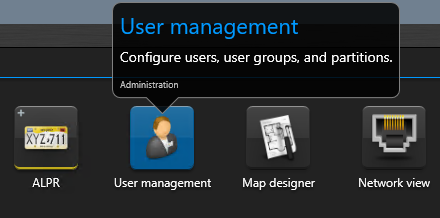
- On the left sidebar, right click Administrators -> Add an entity -> User. Set any username (
aisuitein our example) as the Username, then type a password. The First and last names are optional. Click Next, then click Create. Close the user creation window. - Click the button in the upper left corner of the window.
- Click System -> Roles -> Add an entity -> select Web-based SDK. In the upper button bar, click the middle Properties button.
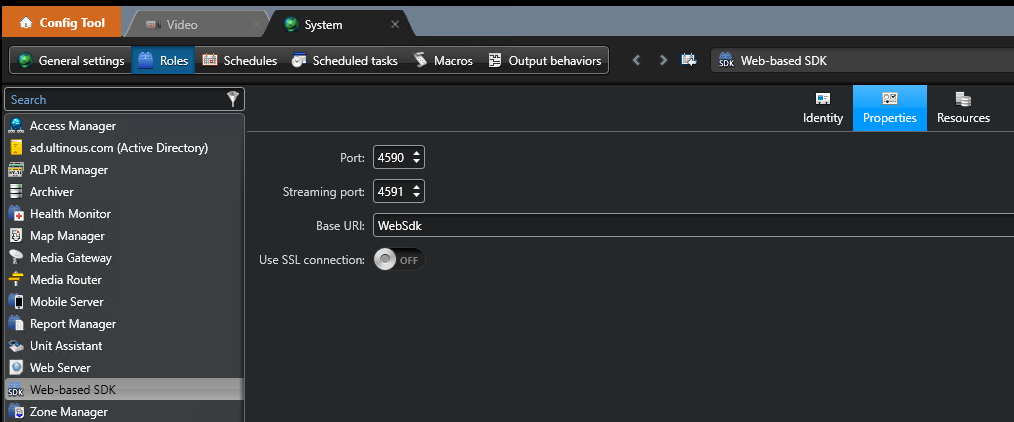
- The default settings are as follows; change them only if you need to.
Port:
4590Streaming port:
4591Base URL:
WebSdkUse SSL connection:
OFF
Camera registration
Click the
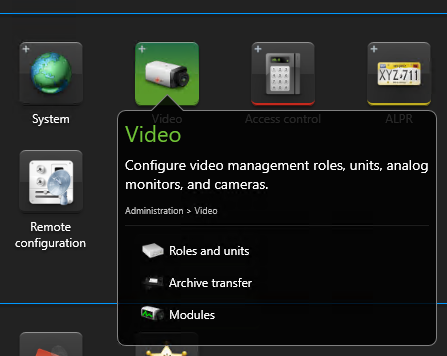
button in the upper left corner of the window.In the Administration category, select Video.
- On the left sidebar, right click Archiver -> Add an entity -> Video unit.
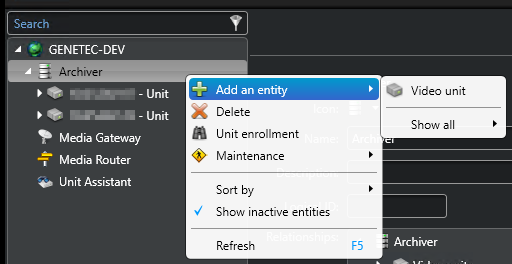
In the popup window, fill in the properties of the camera of your choosing. When done, click Add and close.
Note: You may also try automatically discovering all connected cameras in your network by clicking the
 button on the bottom left button bar, then clicking Start discovery - Note that this may take a long time!
In the left sidebar, select your newly added camera under Archiver and go to the Video tab -> scroll down to Network settings and select RTSP stream over TCP as the Connection type.
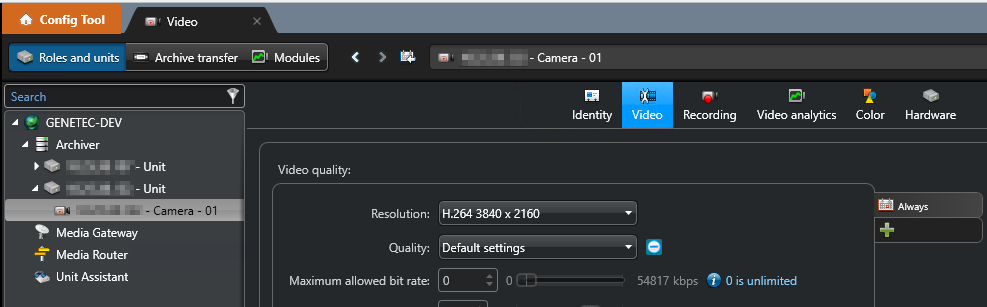
- Click Apply.
Event configuration
- Click the button in the upper left corner of the window.
- In the Administration category, select System -> General settings.
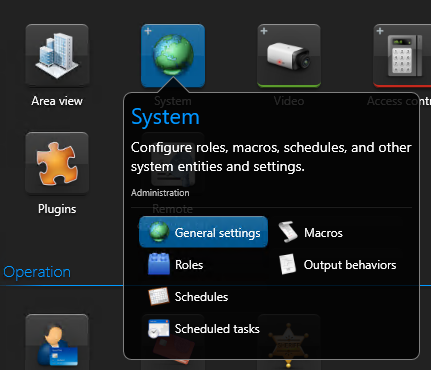
- Select Events on the left sidebar. Click the green + button on the bottom of the screen to add an Event.
- In the pop-up window, fill in the Event data according to the following:
- Name: Give your Event a custom name; in this example,
AI-Suite.- Entity type: You may select any type - its only function is to help you recognise your Event by its icon/type.
- Value: The unique identifier of your Event. You may leave it as default or assign a new unique number. Make sure to note it down or copy it to clipboard, as this identifier is going to be needed in the next step!
- Click Save.
- Open the Ultinous AI Suite Web UI. Go to Solutions -> select the Solution you registered earlier, then click Edit.
- Scroll down to Enable Genetec integration and tick its button. Type the unique identifier you set in the Value field in step 4 above. Make sure that the identifiers match!
- Click Save.
- Open the Control Panel in the left sidebar, then scroll down to System -> Integration. Fill in the form according to the following values:
- Host: The address of the Genetec server.
- Server port:
4590- Base URL:
WebSdk- User name: The username set above, in this example,
aisuite- Password: Type the password you created for the user in the Genetec Config Tool in Step 1.
- Click Save.
Alarm configuration
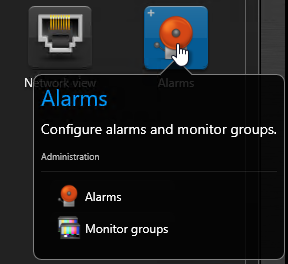
- Click the button in the upper left corner of the window.
- In the Administration category, select Alarms.
- Click the
 button on the bottom left corner of the window.
 - Type any name, in this example,
AI-Suite. - Open the Alarm's Properties tab. Click the green + button under the Recipients field and select the
aisuiteuser created above. Click Add. - Click the green + button under the Attached entities field. Select the camera added in step 3, then click Add.
- Click Apply in the lower right corner of the window.
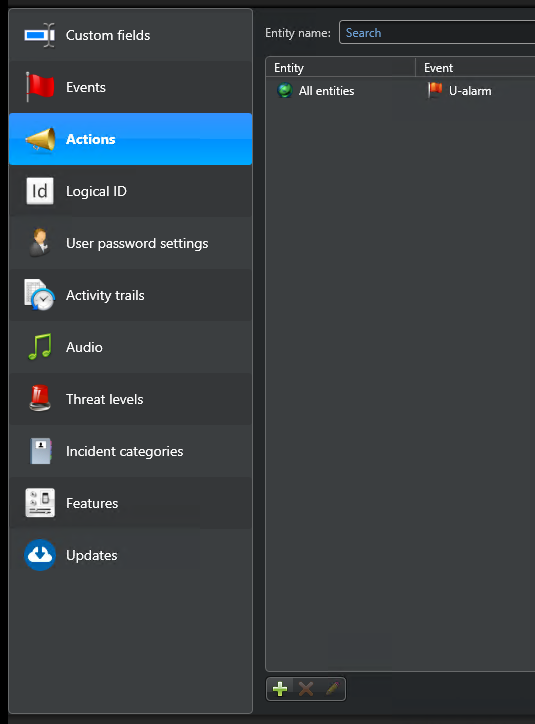
- Click the button in the upper left corner of the window.
- In the Administration category, select System -> General settings -> Actions. Click the green + button in the lower left corner of the window.
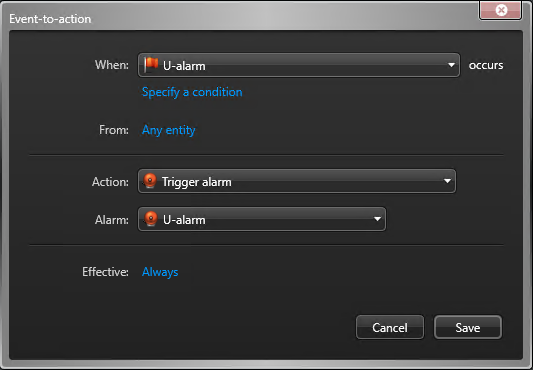
- On the pop-up window, type
AI-Suitein the Where field. Press Enter, then select the AI-Suite Event created above. Select Trigger alarm as Action and AI-Suite as the Alarm. You may select a schedule in Effective (optional). Click Save.
- In Actions, click the green + in the lower left corner of the window again.
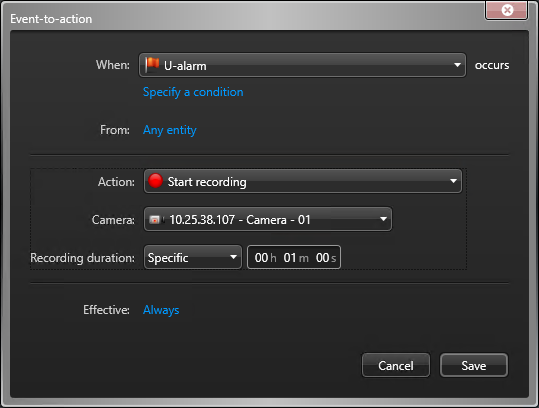
- On the pop-up window, type
AI-Suitein the When field, press Enter, then select the AI-Suite Event created above. Select Start recording as Action and your previously configured camera as the Camera. Set a time interval for the Recording duration (such as 1 minute). You may select a schedule in Effective (optional). Click Save.
All set! Your camera and associated Event is now ready to be viewed in Genetec Security Center - Security Desk.